Stayer 101 Framebuilding Course

There’s a satisfaction that comes from making something from scratch, with no prior experience.
I’d been toying with the idea of doing a framebuilding course for a while now. I discovered that the folks at Stayer Cycles had started offering courses for those curious about what it takes to build a steel frame from scratch. After a few emails back and forth with Sam and Judith, I took the plunge and signed up for the five‑day course.
Stayer are a UK‑based frame and wheel building outfit in North East London. They make custom frames and wheels with a focus on celebrating the spirit of making things. Alongside their custom work, they offer a wheel building course, another thing I’d like to try my hands at one day. More recently they have created the Carry On Conversion where you can bring an old 26” mtb frame to them, they’ll chop the front end off and covert it into a cargo bike, such a great initiative to bring a new lease of life into old frames.
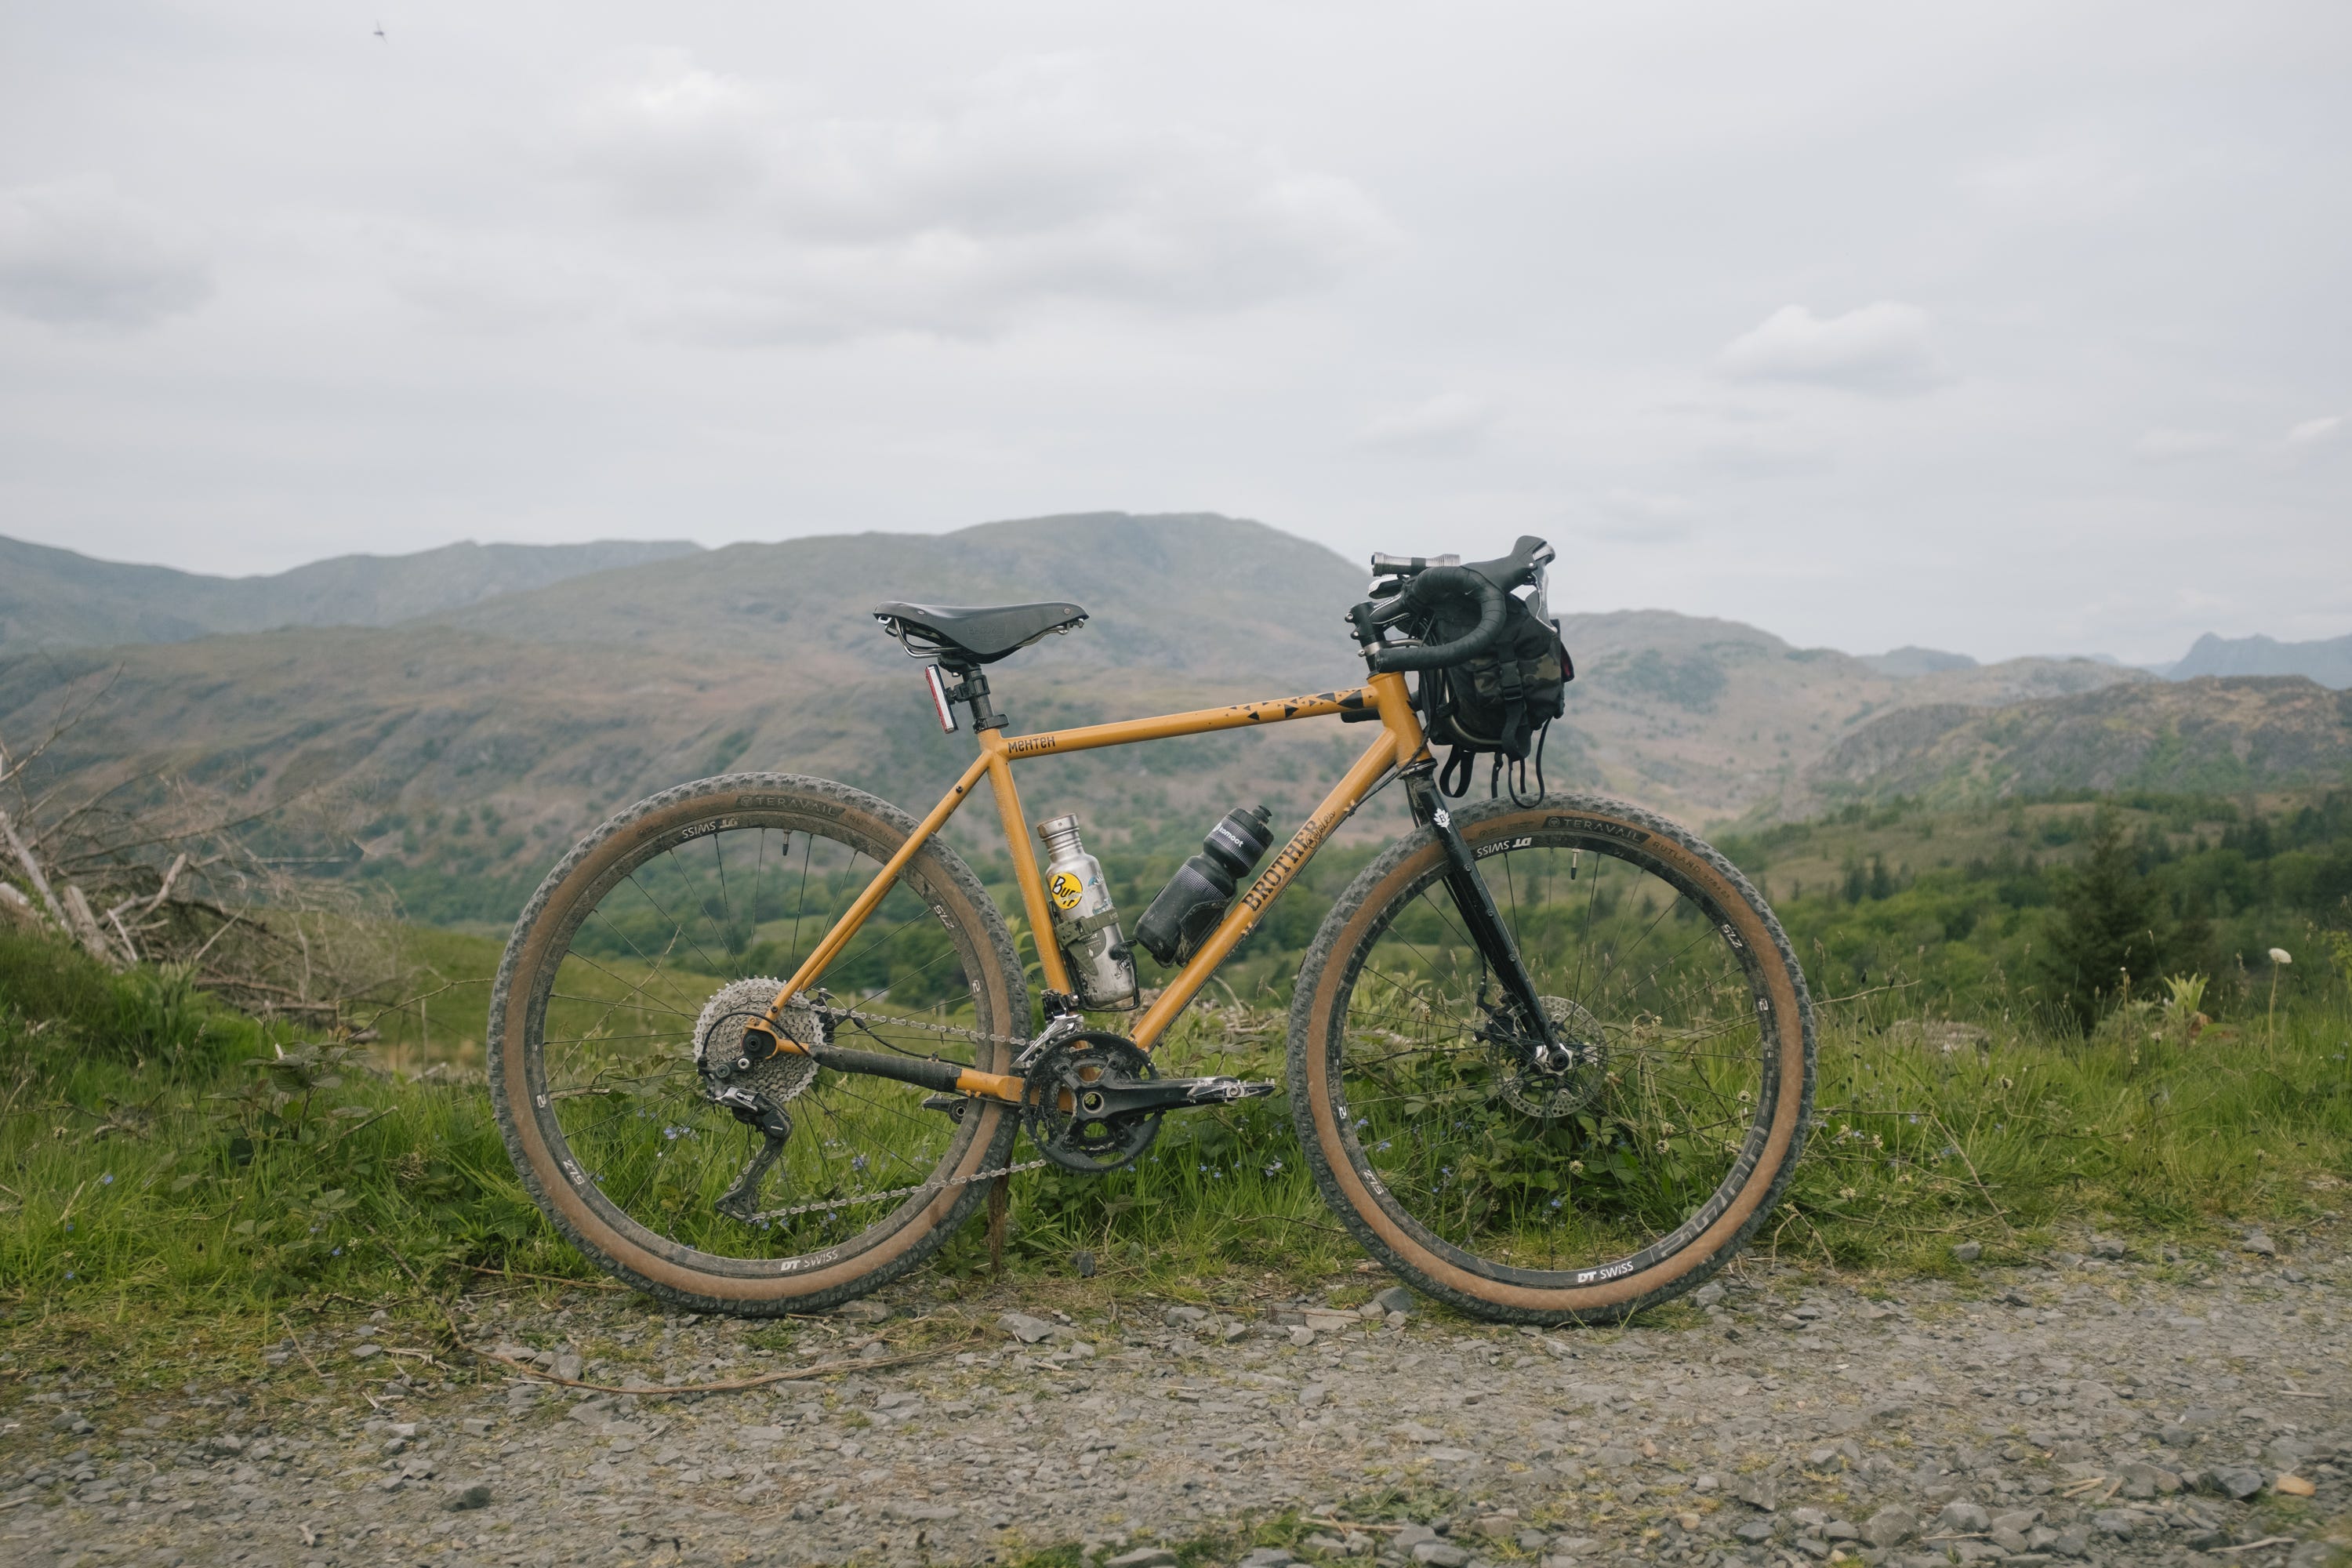
Being the kind of person who doesn’t rush into making decisions, I considered all options on what type of frame to build. Single‑speed tracklocross, randonneur with rim brakes, rigid touring hardtail, all were considered. With four bikes already squeezed into our modest flats spare room and operating a fairly strict one‑in, one‑out policy, it was time to part ways with my Brother Meteh, the bike I’ve ridden more than any other in recent years. It was decided… I’d build a monster‑cross frame that would handle the type of riding that I do regularly, comfy for long days on forest trails and able to fit chunky enough rubber for when things get loose on a bit of single track.
The process was refreshingly straight forward. A few emails with Sam ahead of time covered what the course would entail, what my existing bikes were and the kind of frame I was thinking about building.
A video call a week before the course let us get into the gritty detail, where Sam’s attitude was reassuringly open and chilled out. Nothing was a problem, while still being realistic about what we could achieve in five days and how much support we would get to walk away with a finished frame. We talked material choices and the subtle geometry tweaks that would influence handling and ride feel. When I showed him a stem I had my eye on for the final build, with a grin, he suggested we could make something just as nice for less and uniquely mine. That moment summed up working with Sam: an excitement for the process and a generosity in sharing his experience.
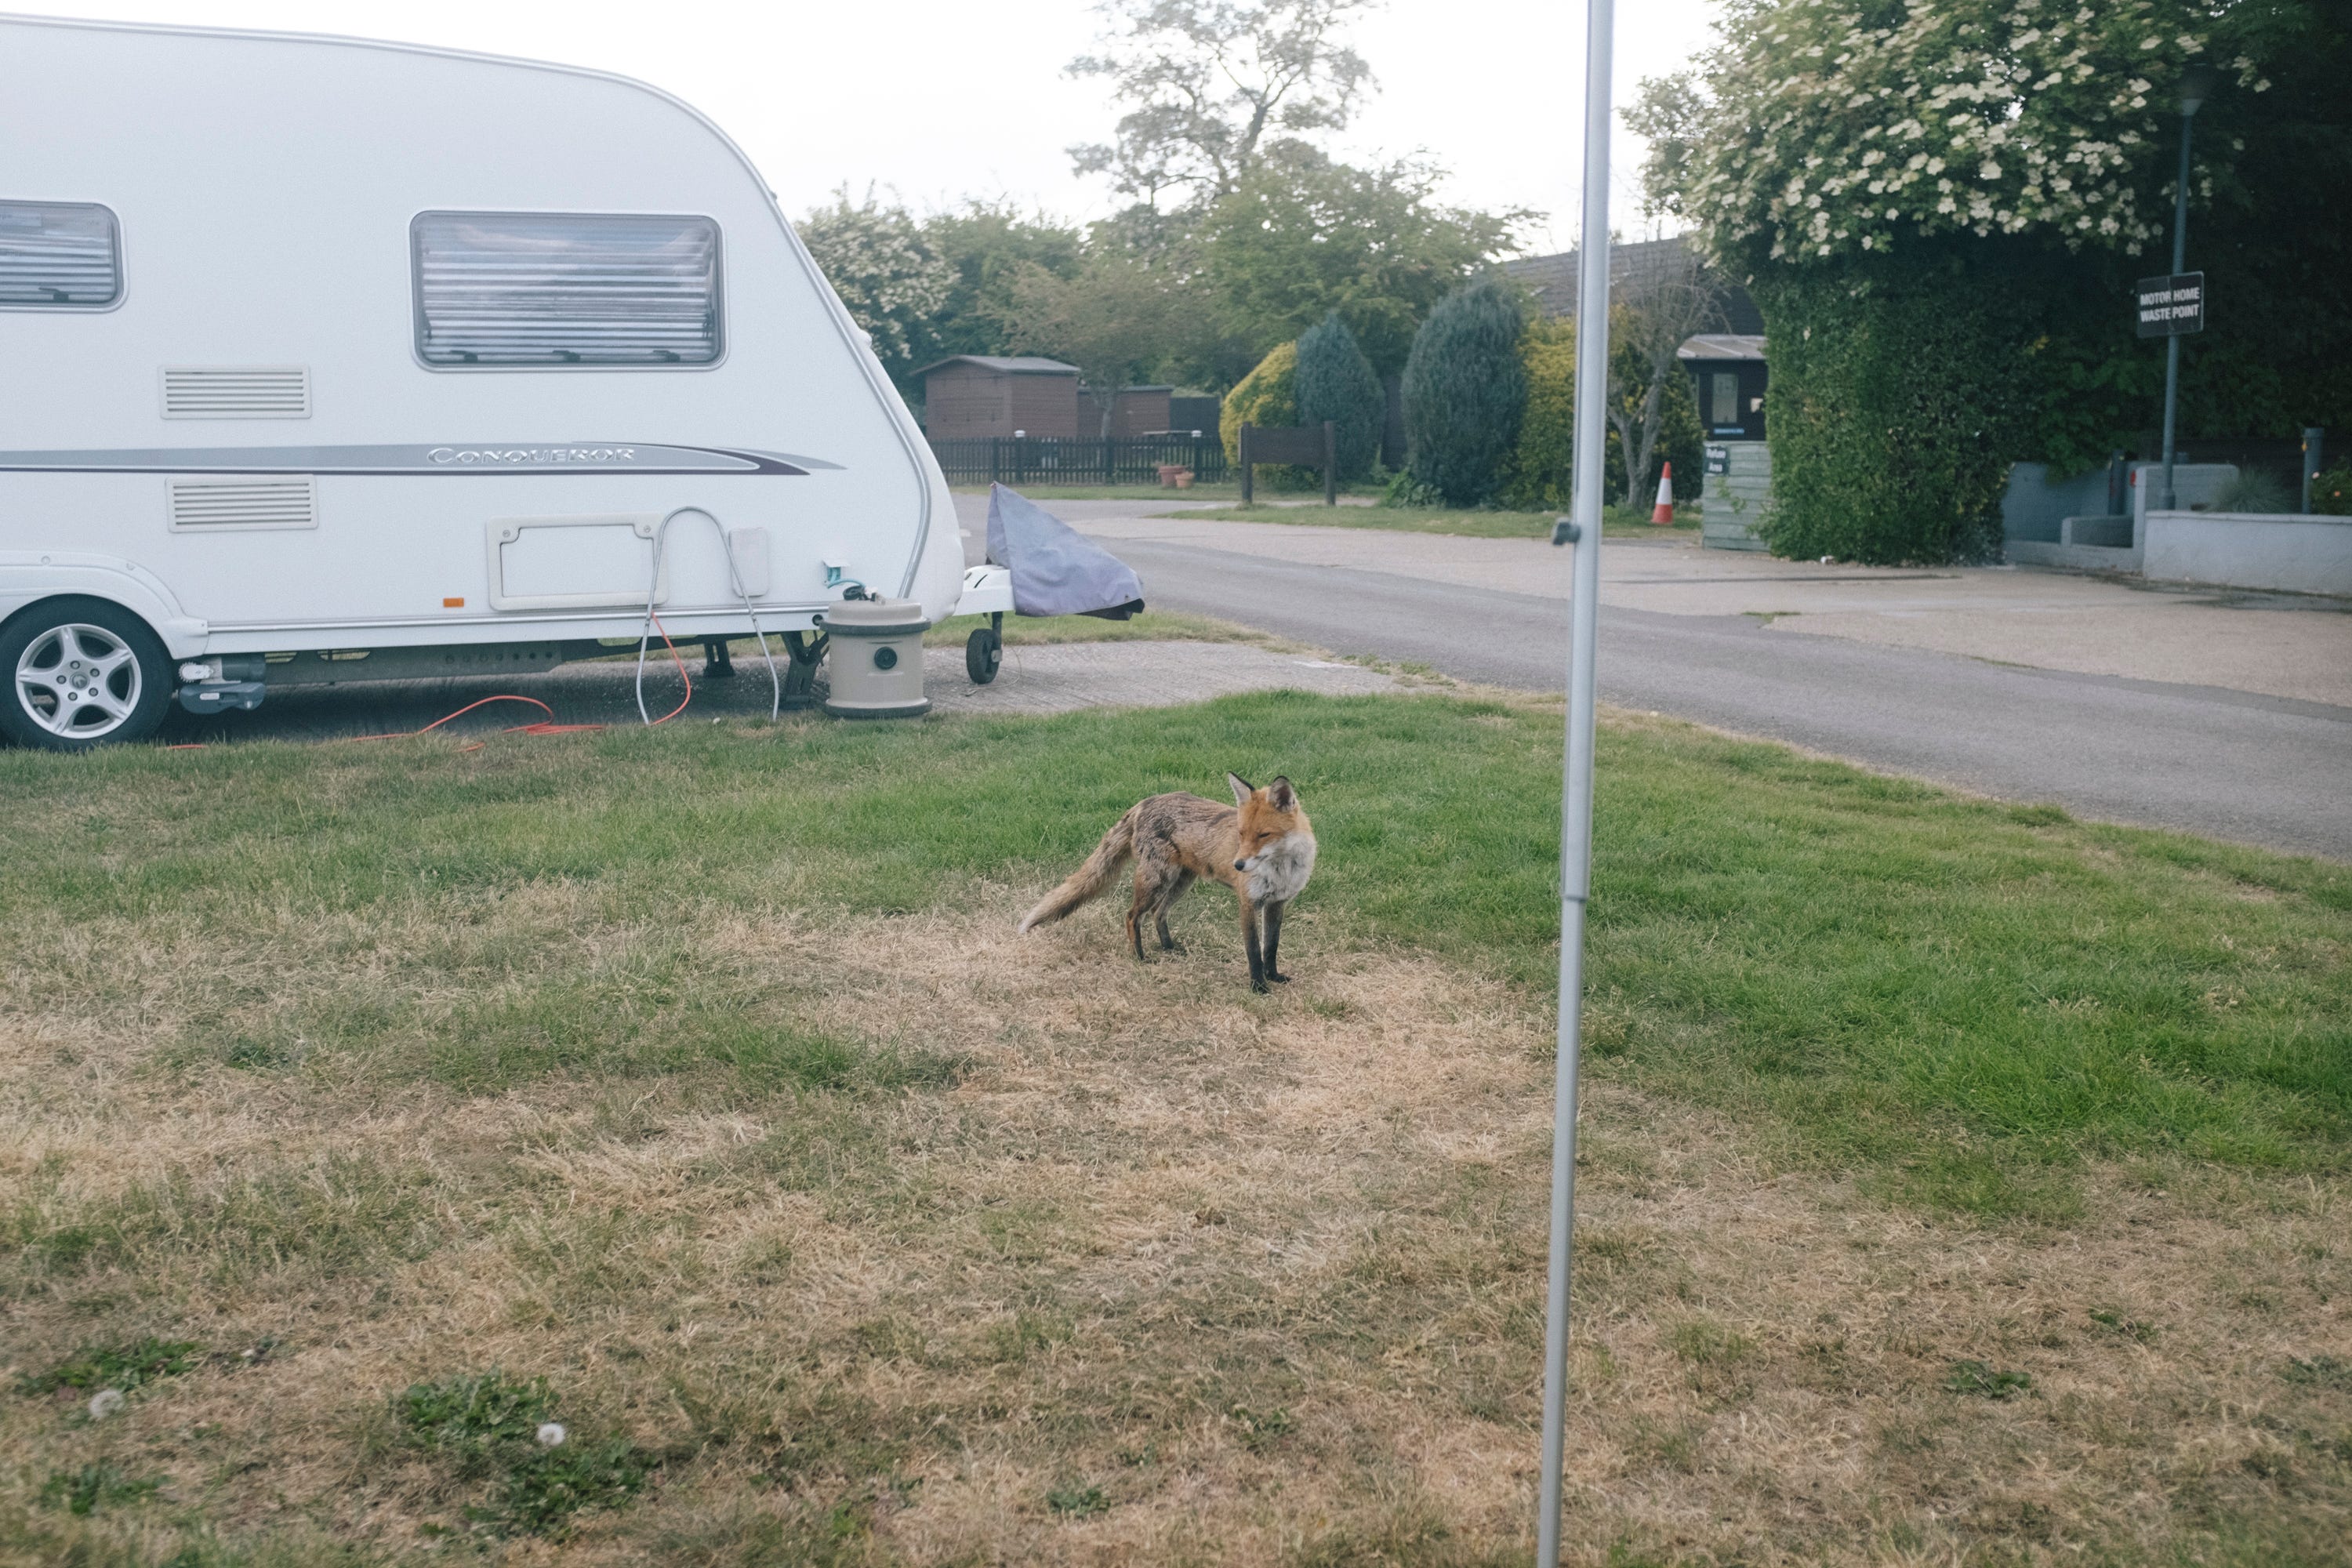
I packed up the van and headed to London, staying at a campsite just inside the M25. Not the most scenic spot I’ve ever stayed at, but it had hot showers as well as a resident fox that might steal your shoes if you left them outside at night, what more could you ask for? Each morning involved an eight‑mile ride through industrial landscapes, along a canal and winding through the bustling streets before reaching Leytonstone, where Stayer’s workshop is tucked into a small courtyard. The warm and sweet smells from the nearby coffee roastery perking up my senses for the weeks learning.
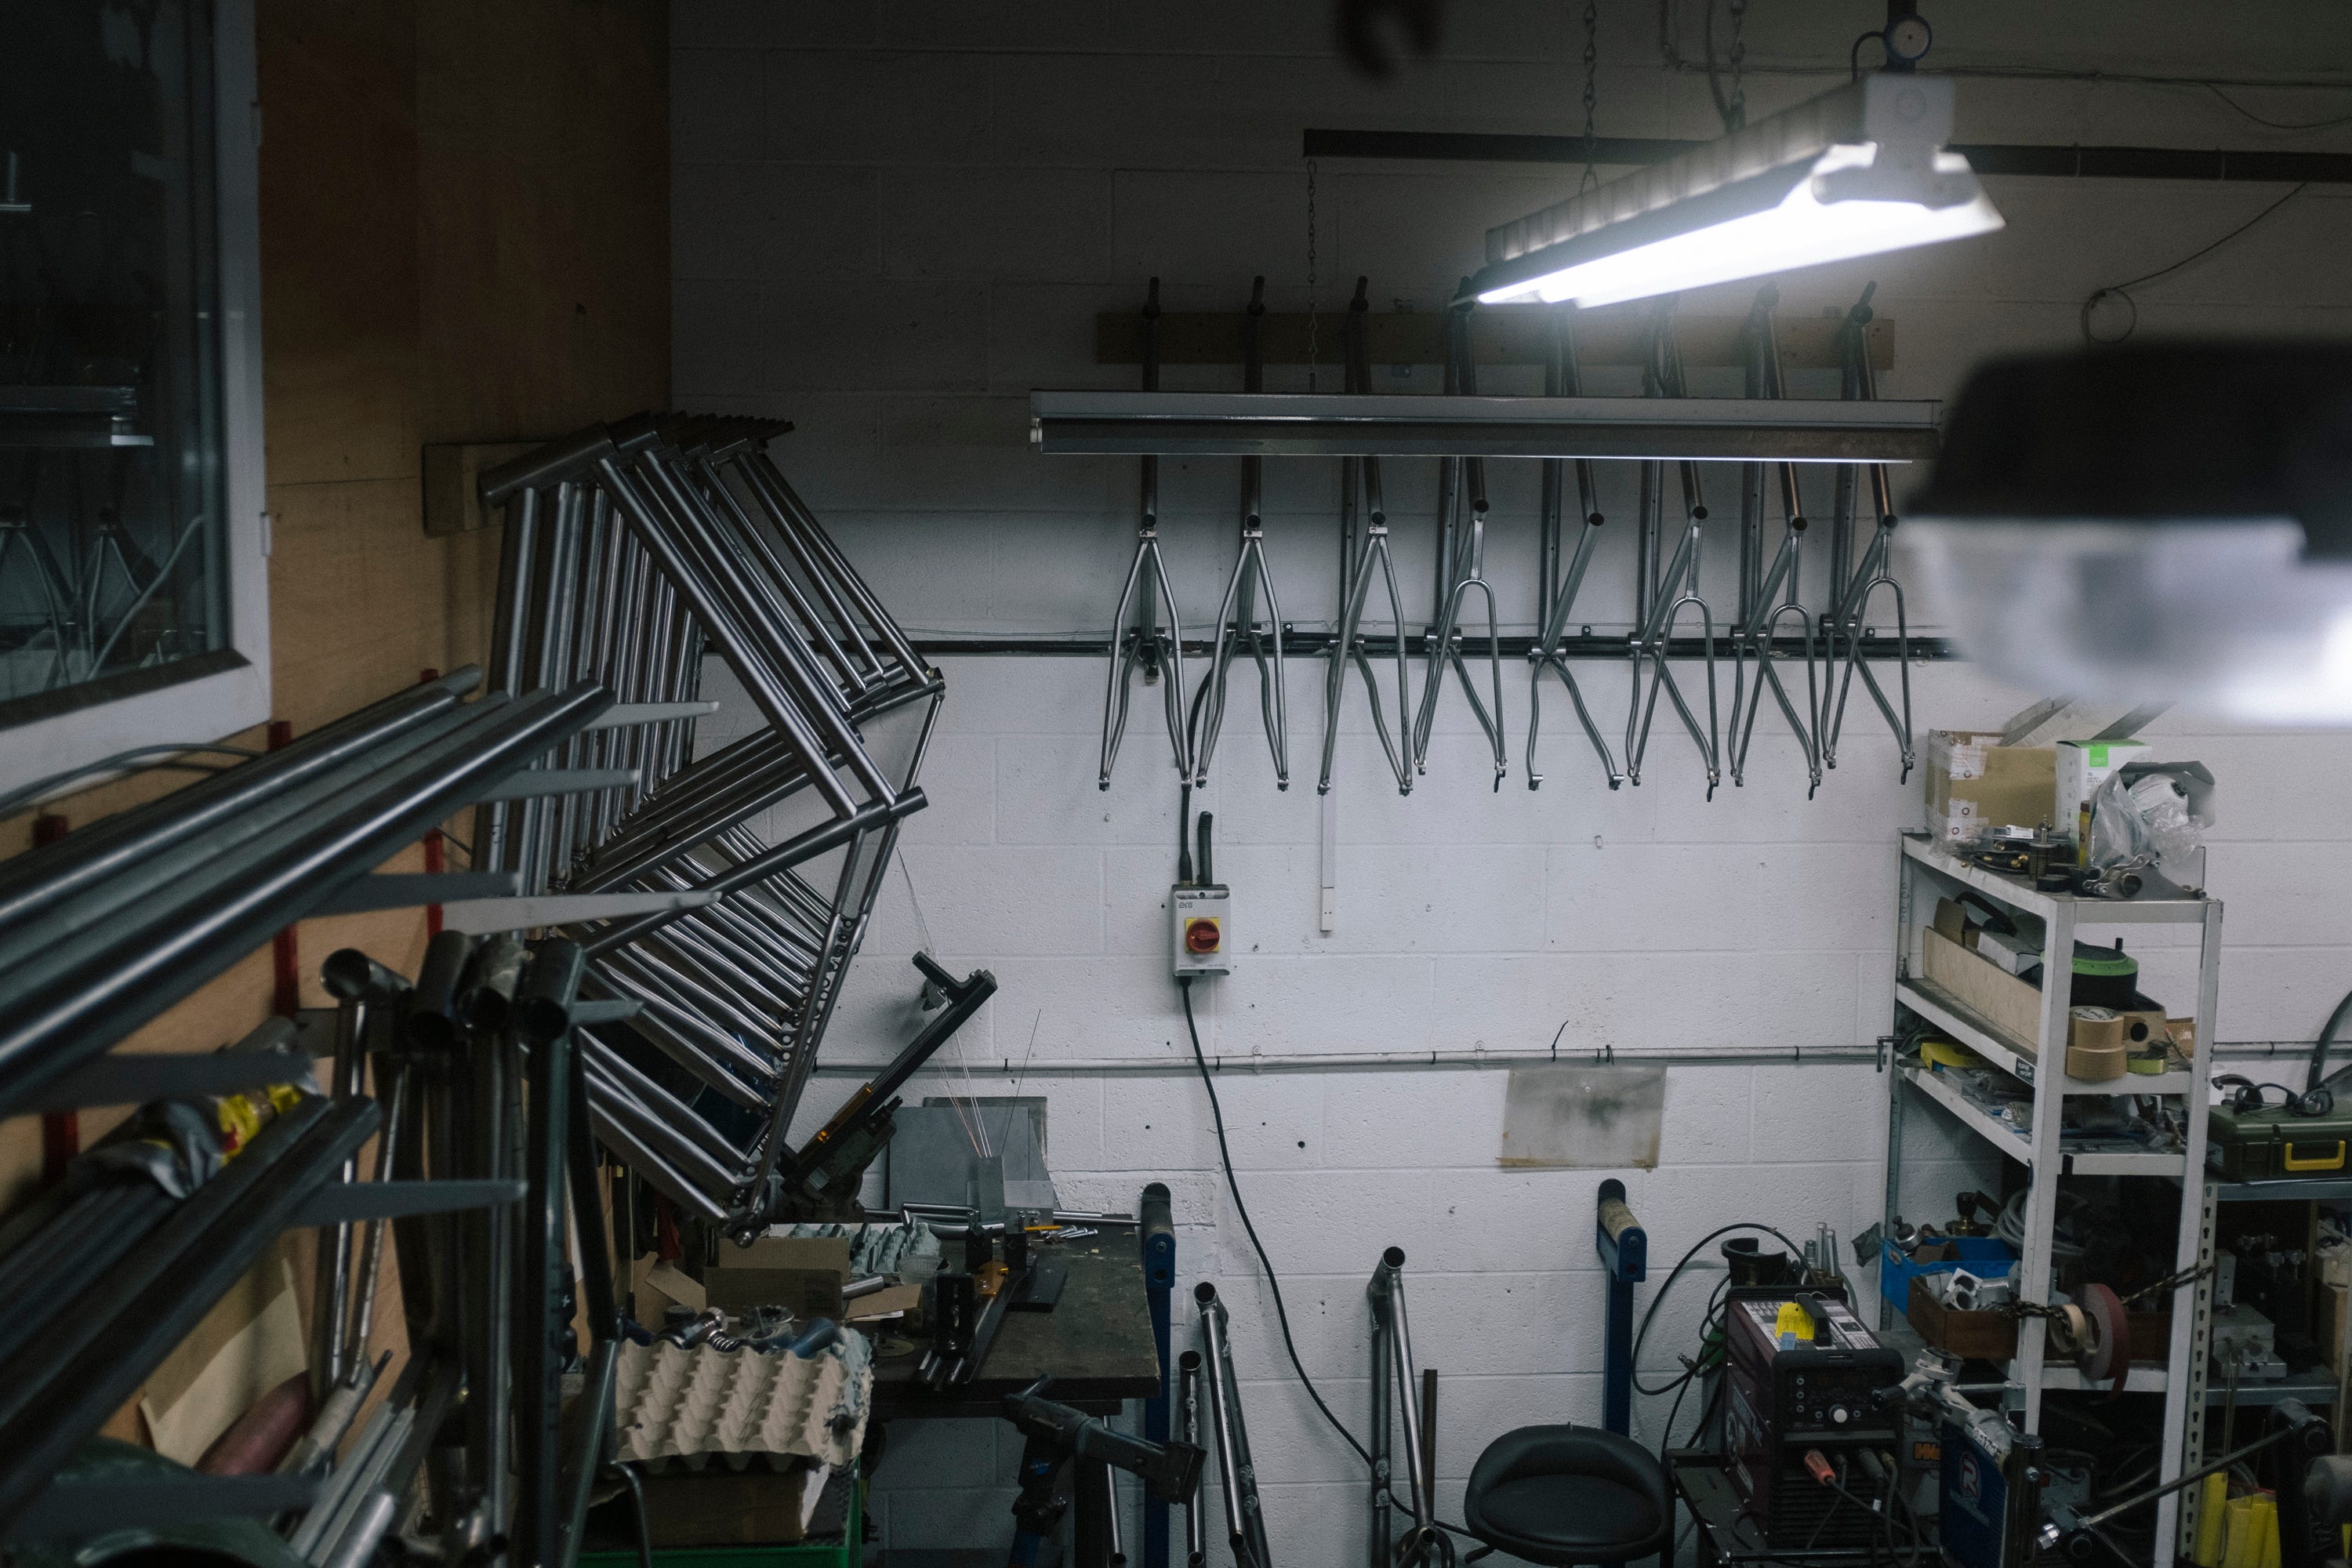
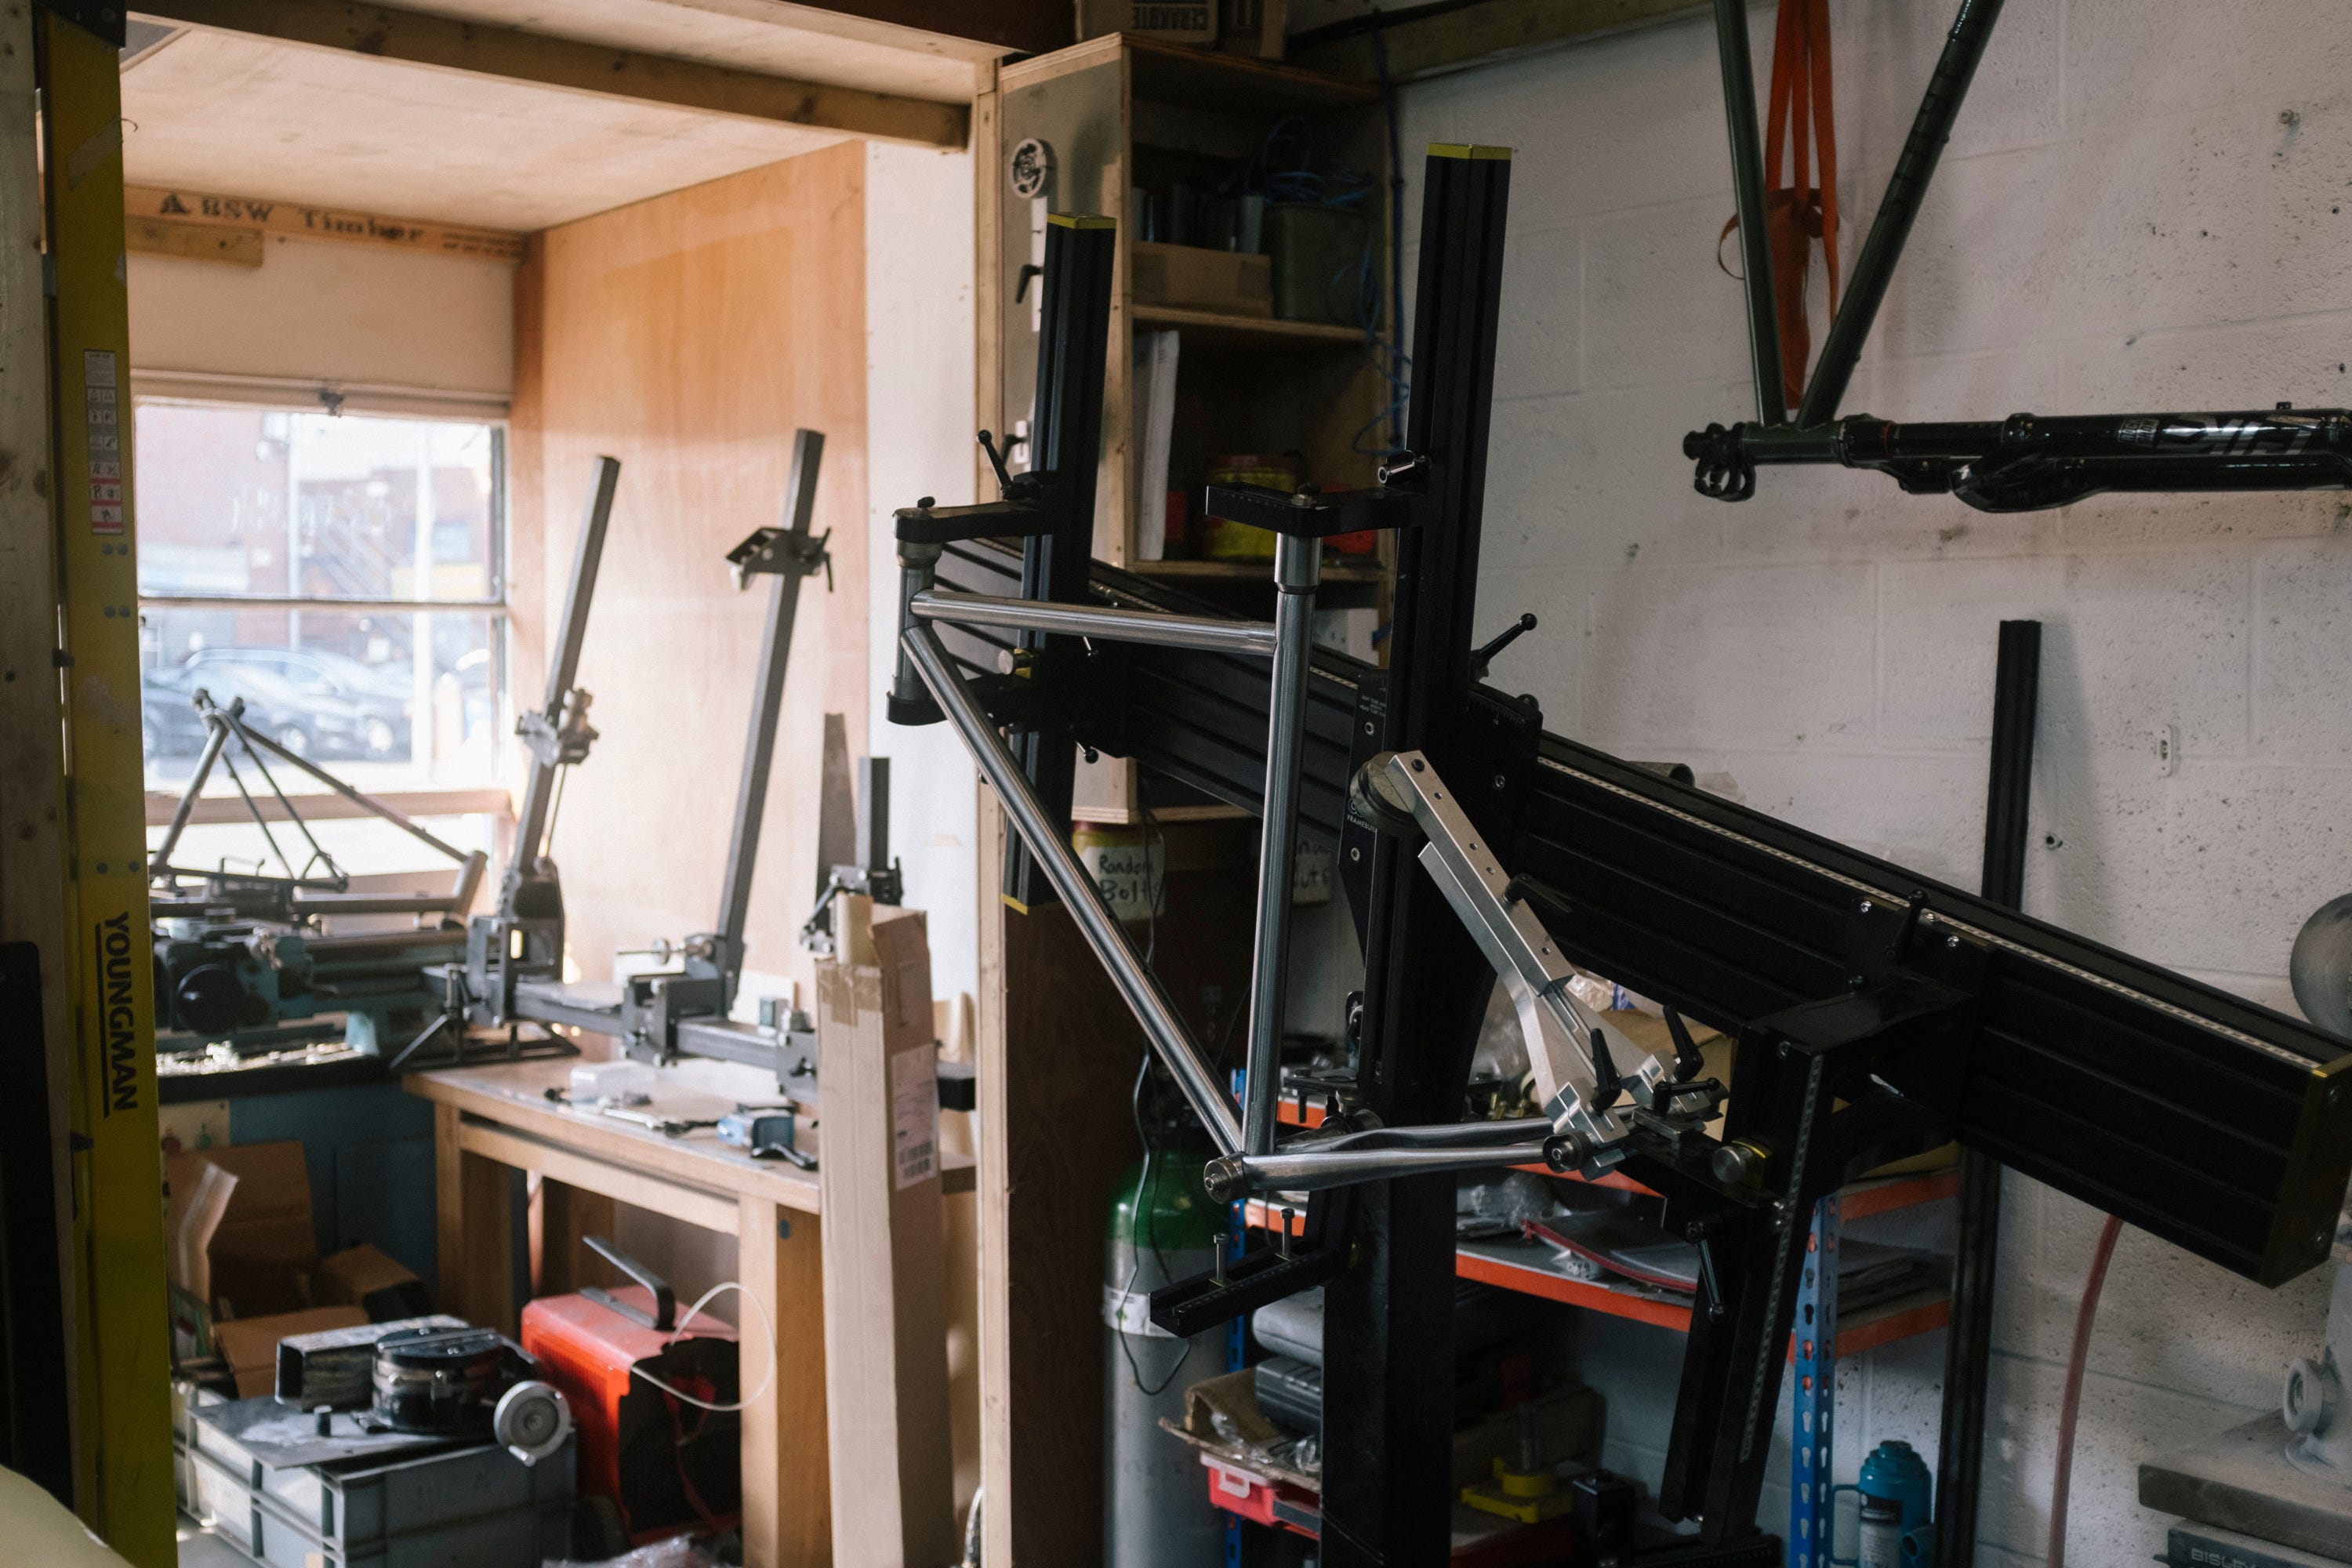
I arrived on day one with just enough time to eat a banana before being offered a coffee by Sam and meeting Danny, who I’d be taking the course with. We chatted about the state of the UK bike industry and ran through the plan for the week: finalising drawings, setting up the frame jig, cutting and mitring tubes, brazing and finishing. The Stayer workshop is how all busy workshops should be, in my opinion, an organised kind of chaos, every inch of space put to use. Production and custom frames hung from the walls in various states of completion, with parts for future projects tucked away in corners.
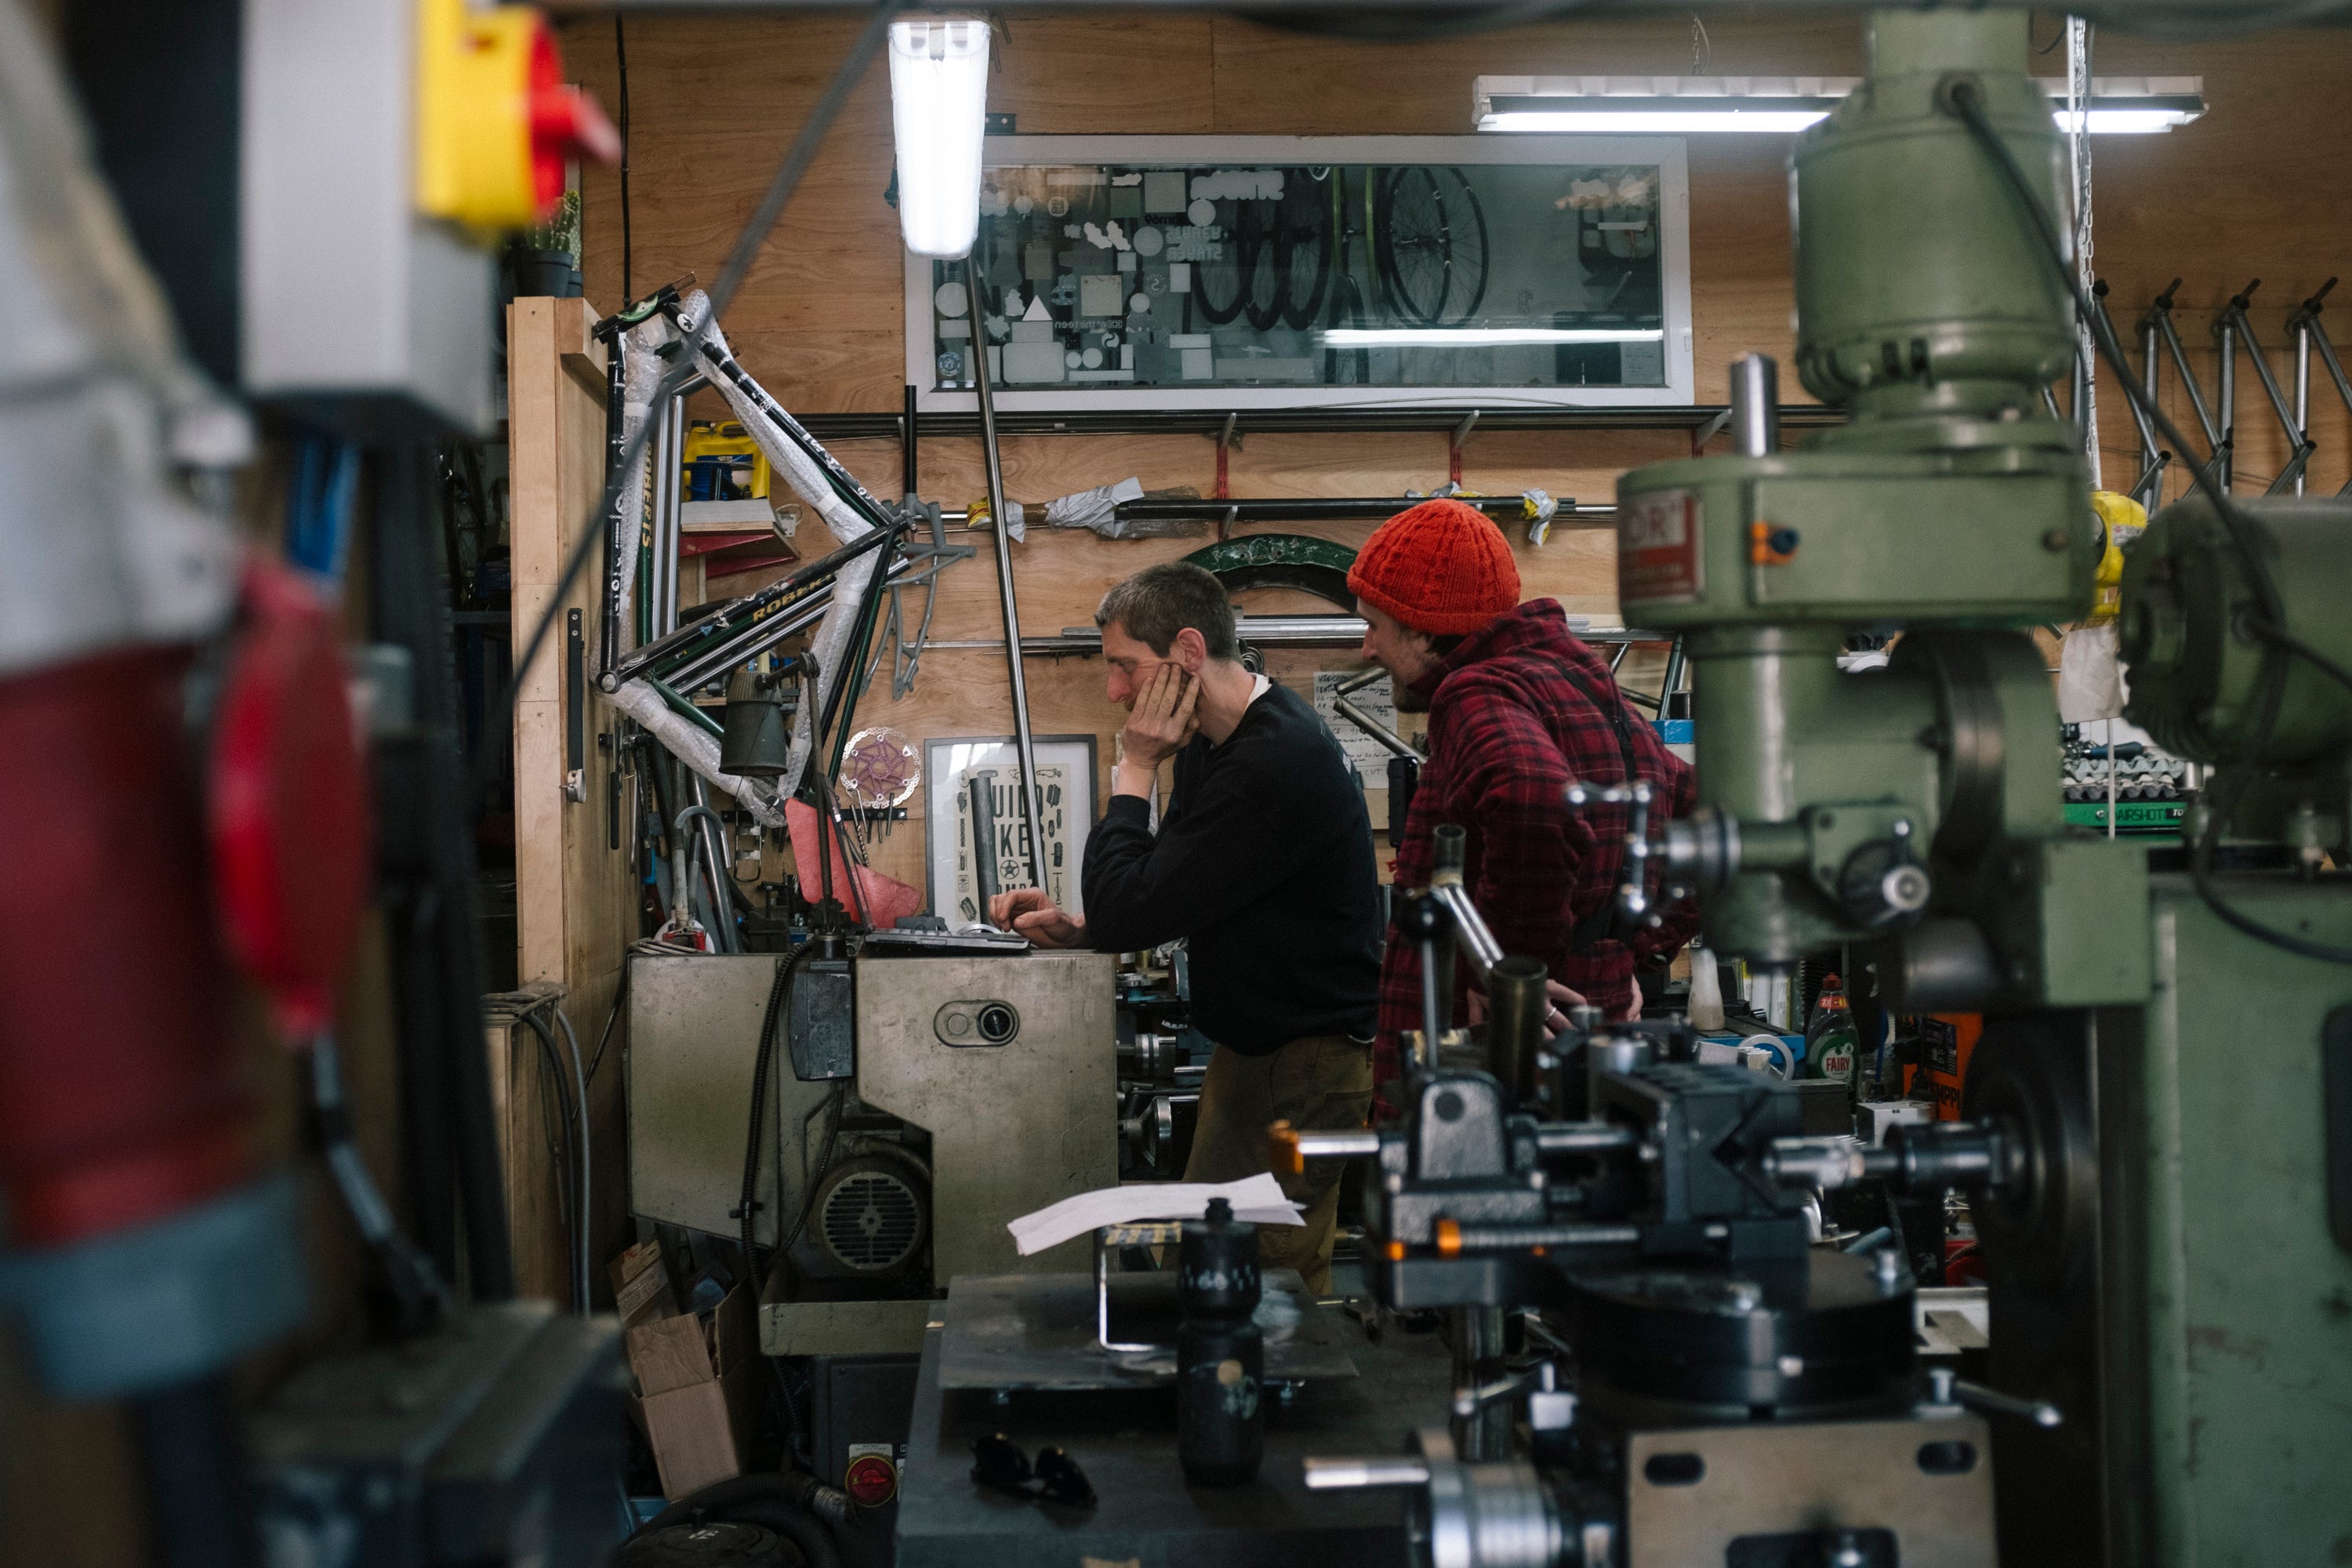
After a safety lesson on the oxy‑acetylene torch, along with some entertaining stories from the pre‑flashback‑arrestor days, Sam demonstrated how to lay a bead of brass onto a piece of steel box section. Each molten blob flowed and re‑formed under the heat of the torch, creating the bond that would eventually hold my frame together. Then it was over to us to copy, the nerves of getting it wrong soon drifted away as I became more confident with each line of brass created.
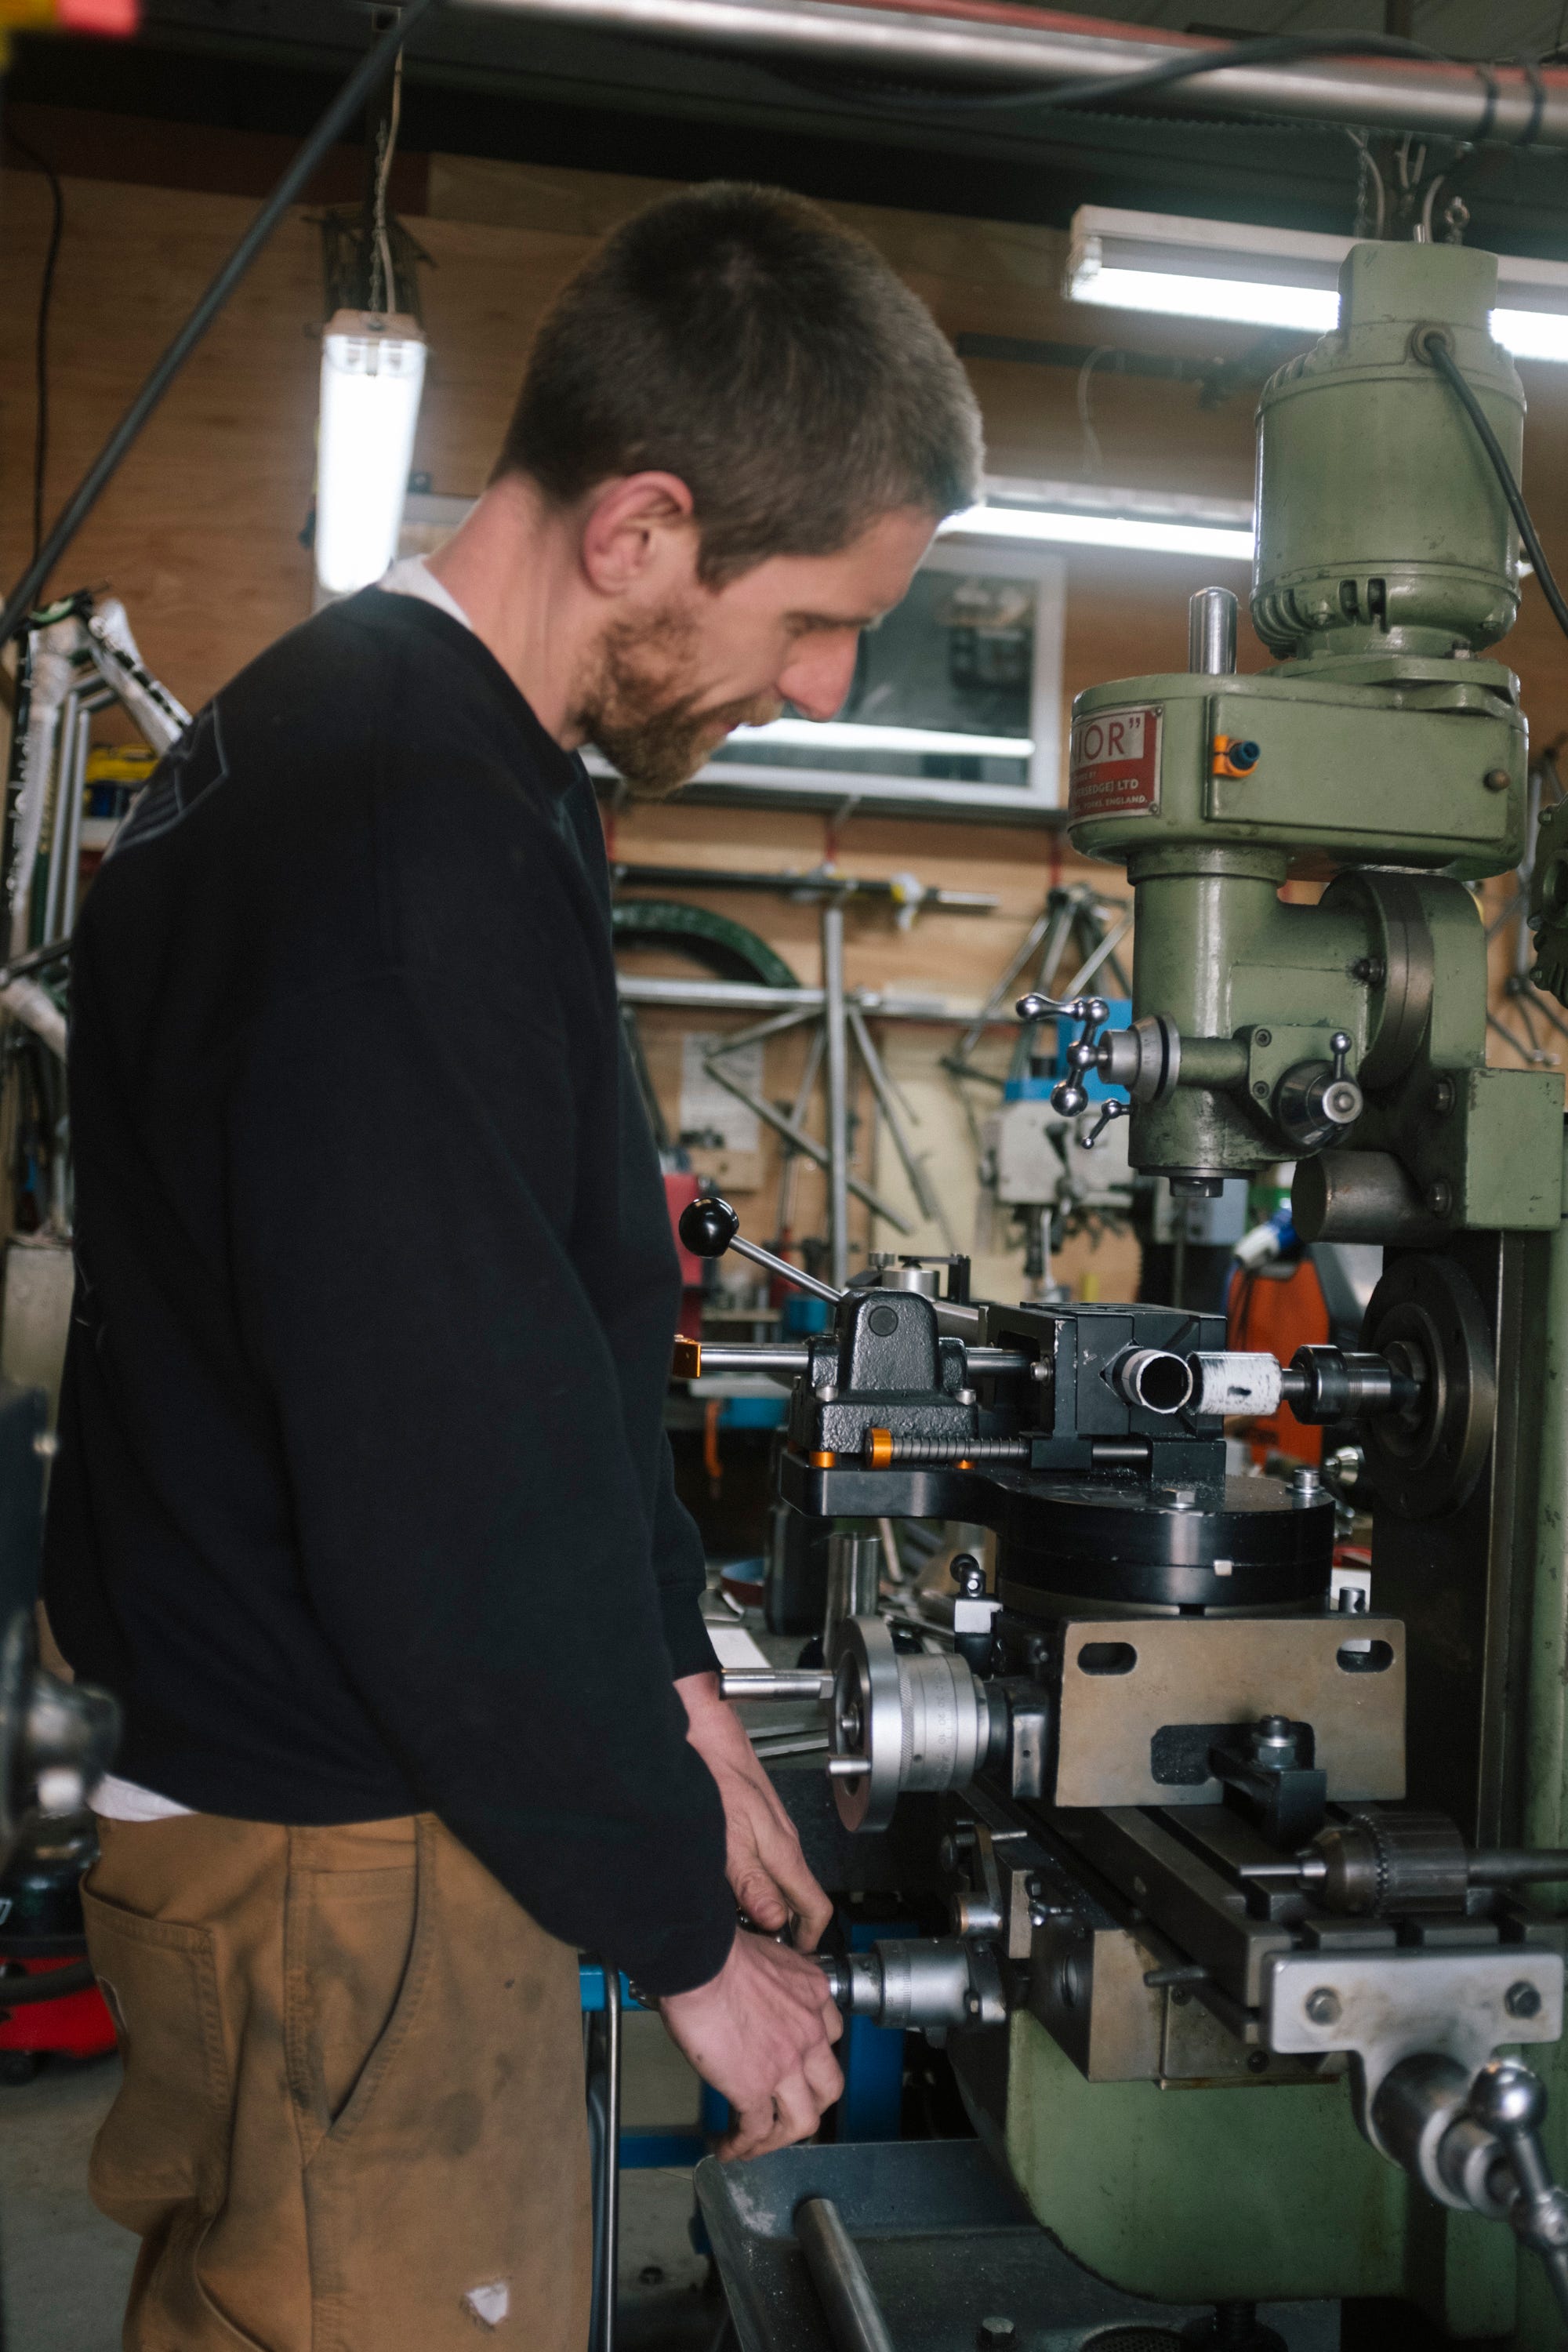
Day two started with printing the final drawings and setting up the frame jig. The first tube we cut was the seat tube, done with an angle grinder and finished by hand, proving that much of the work can be done with simple hand tools if you wanted to. After a quick stroke of Edi, the workshop dog, it was back to brazing practice, this time on round tubes, learning how gravity affects molten brass. Sam mitred the other tubes on the mill, leaving us to clean up the cuts with a file, and my favourite tool the handheld belt sander.
Each evening I pedalled back to the campsite via different routes, exploring Wanstead Park and surrounding areas, replaying the day’s lessons and thinking ahead to what was coming next. Simple dinners, warm evening sun and early nights at sunset became the rhythm of the week.
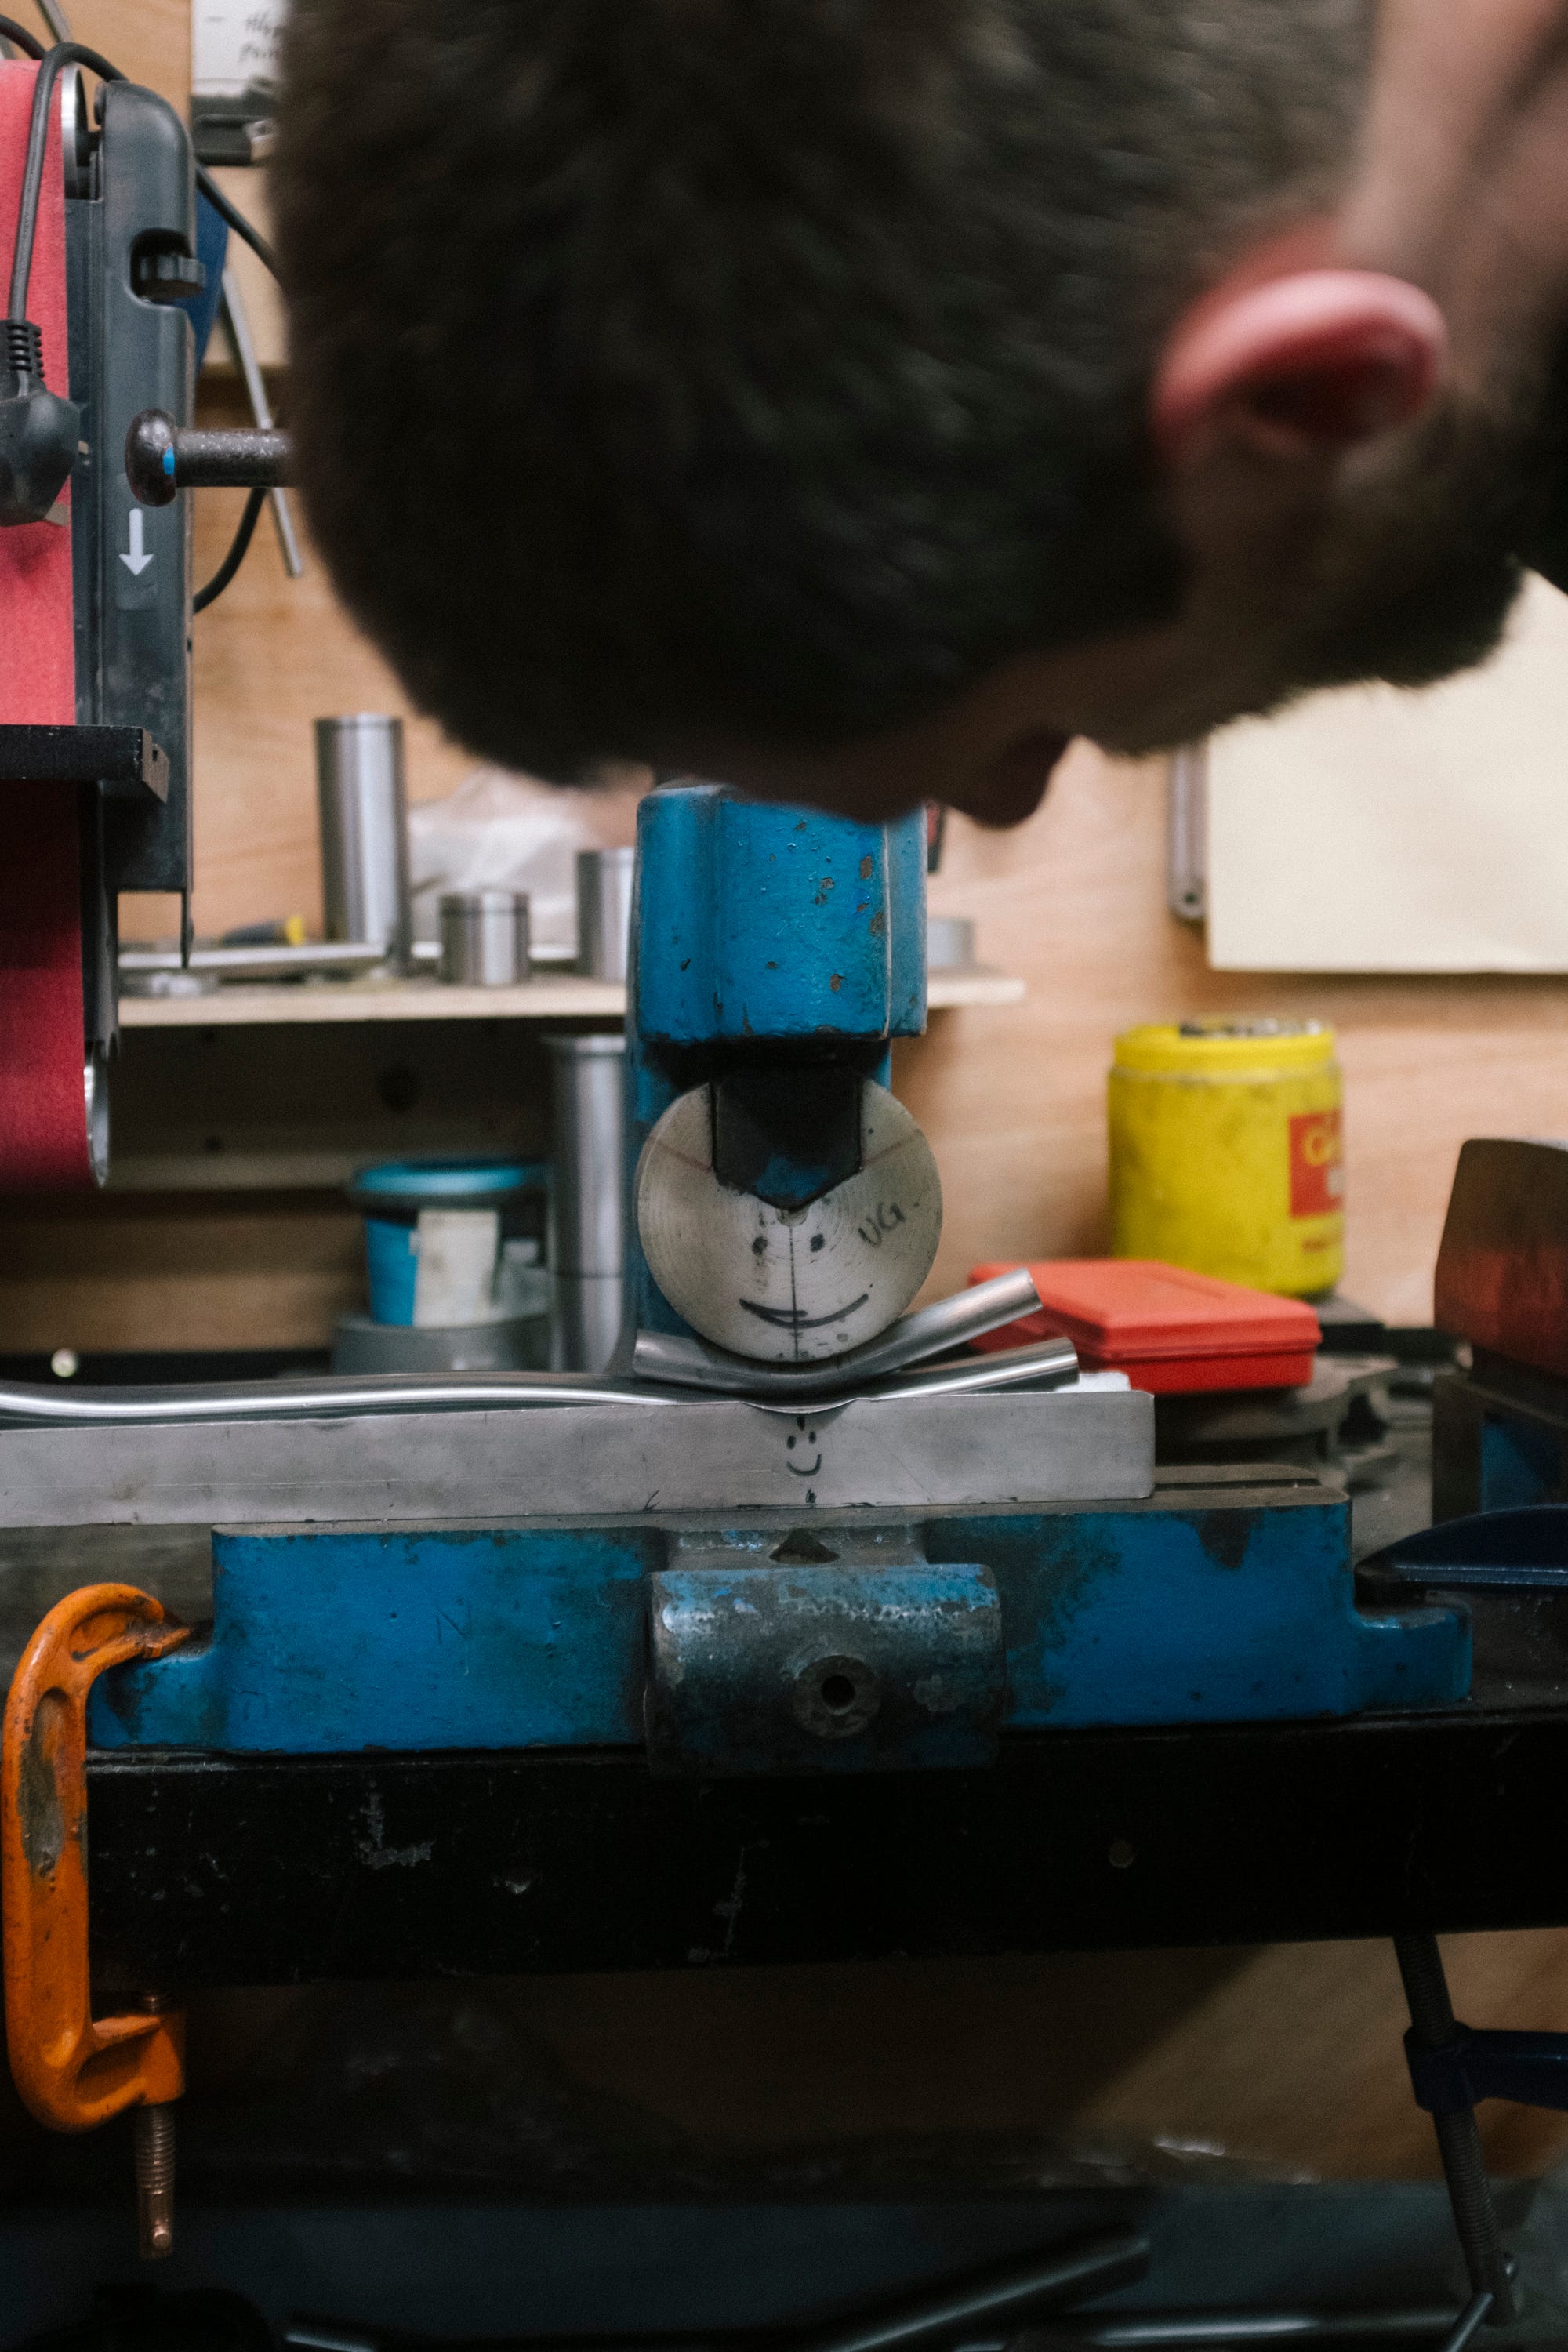
Day three shifted focus to the rear end: seatstays and chainstays. Stayer have a signature wishbone seatstay on most of there frames, one continuous piece of metal bent around the tyre for a clean, modern look. I opted for something more traditional, knowing I’d be pairing the frame with a lugged fork made by my friend Chris in Edinburgh. This turned out to be the more fiddly route, involving careful filing where the stays meet the dropouts until everything lined up. One big takeaway was the value of full‑scale paper drawings. I’d wondered why chainstay templates were missing from the CAD drawing, turns out pen and paper are hard to beat when balancing tyre clearance with chainring and cranks. Dimpling the chainstays was another highlight, with the Sharpie‑drawn smiley face on the tool offering moral support as the metal deformed into shape.
Day four was spent assembling the remaining tubes and drilling holes for bottle bosses, cable guides, drain and vent holes. After that, it was time to braze the mini-bike, a tiny practice frame used to rehearse the order of operations for the real thing, with Sam and Willow (An expert welder at Stayer) rotating the frame while we laid down brass. This was really fulfilling to see after a few days of tuition and heavy hand holding I could braze the three main tubes of a frame together.
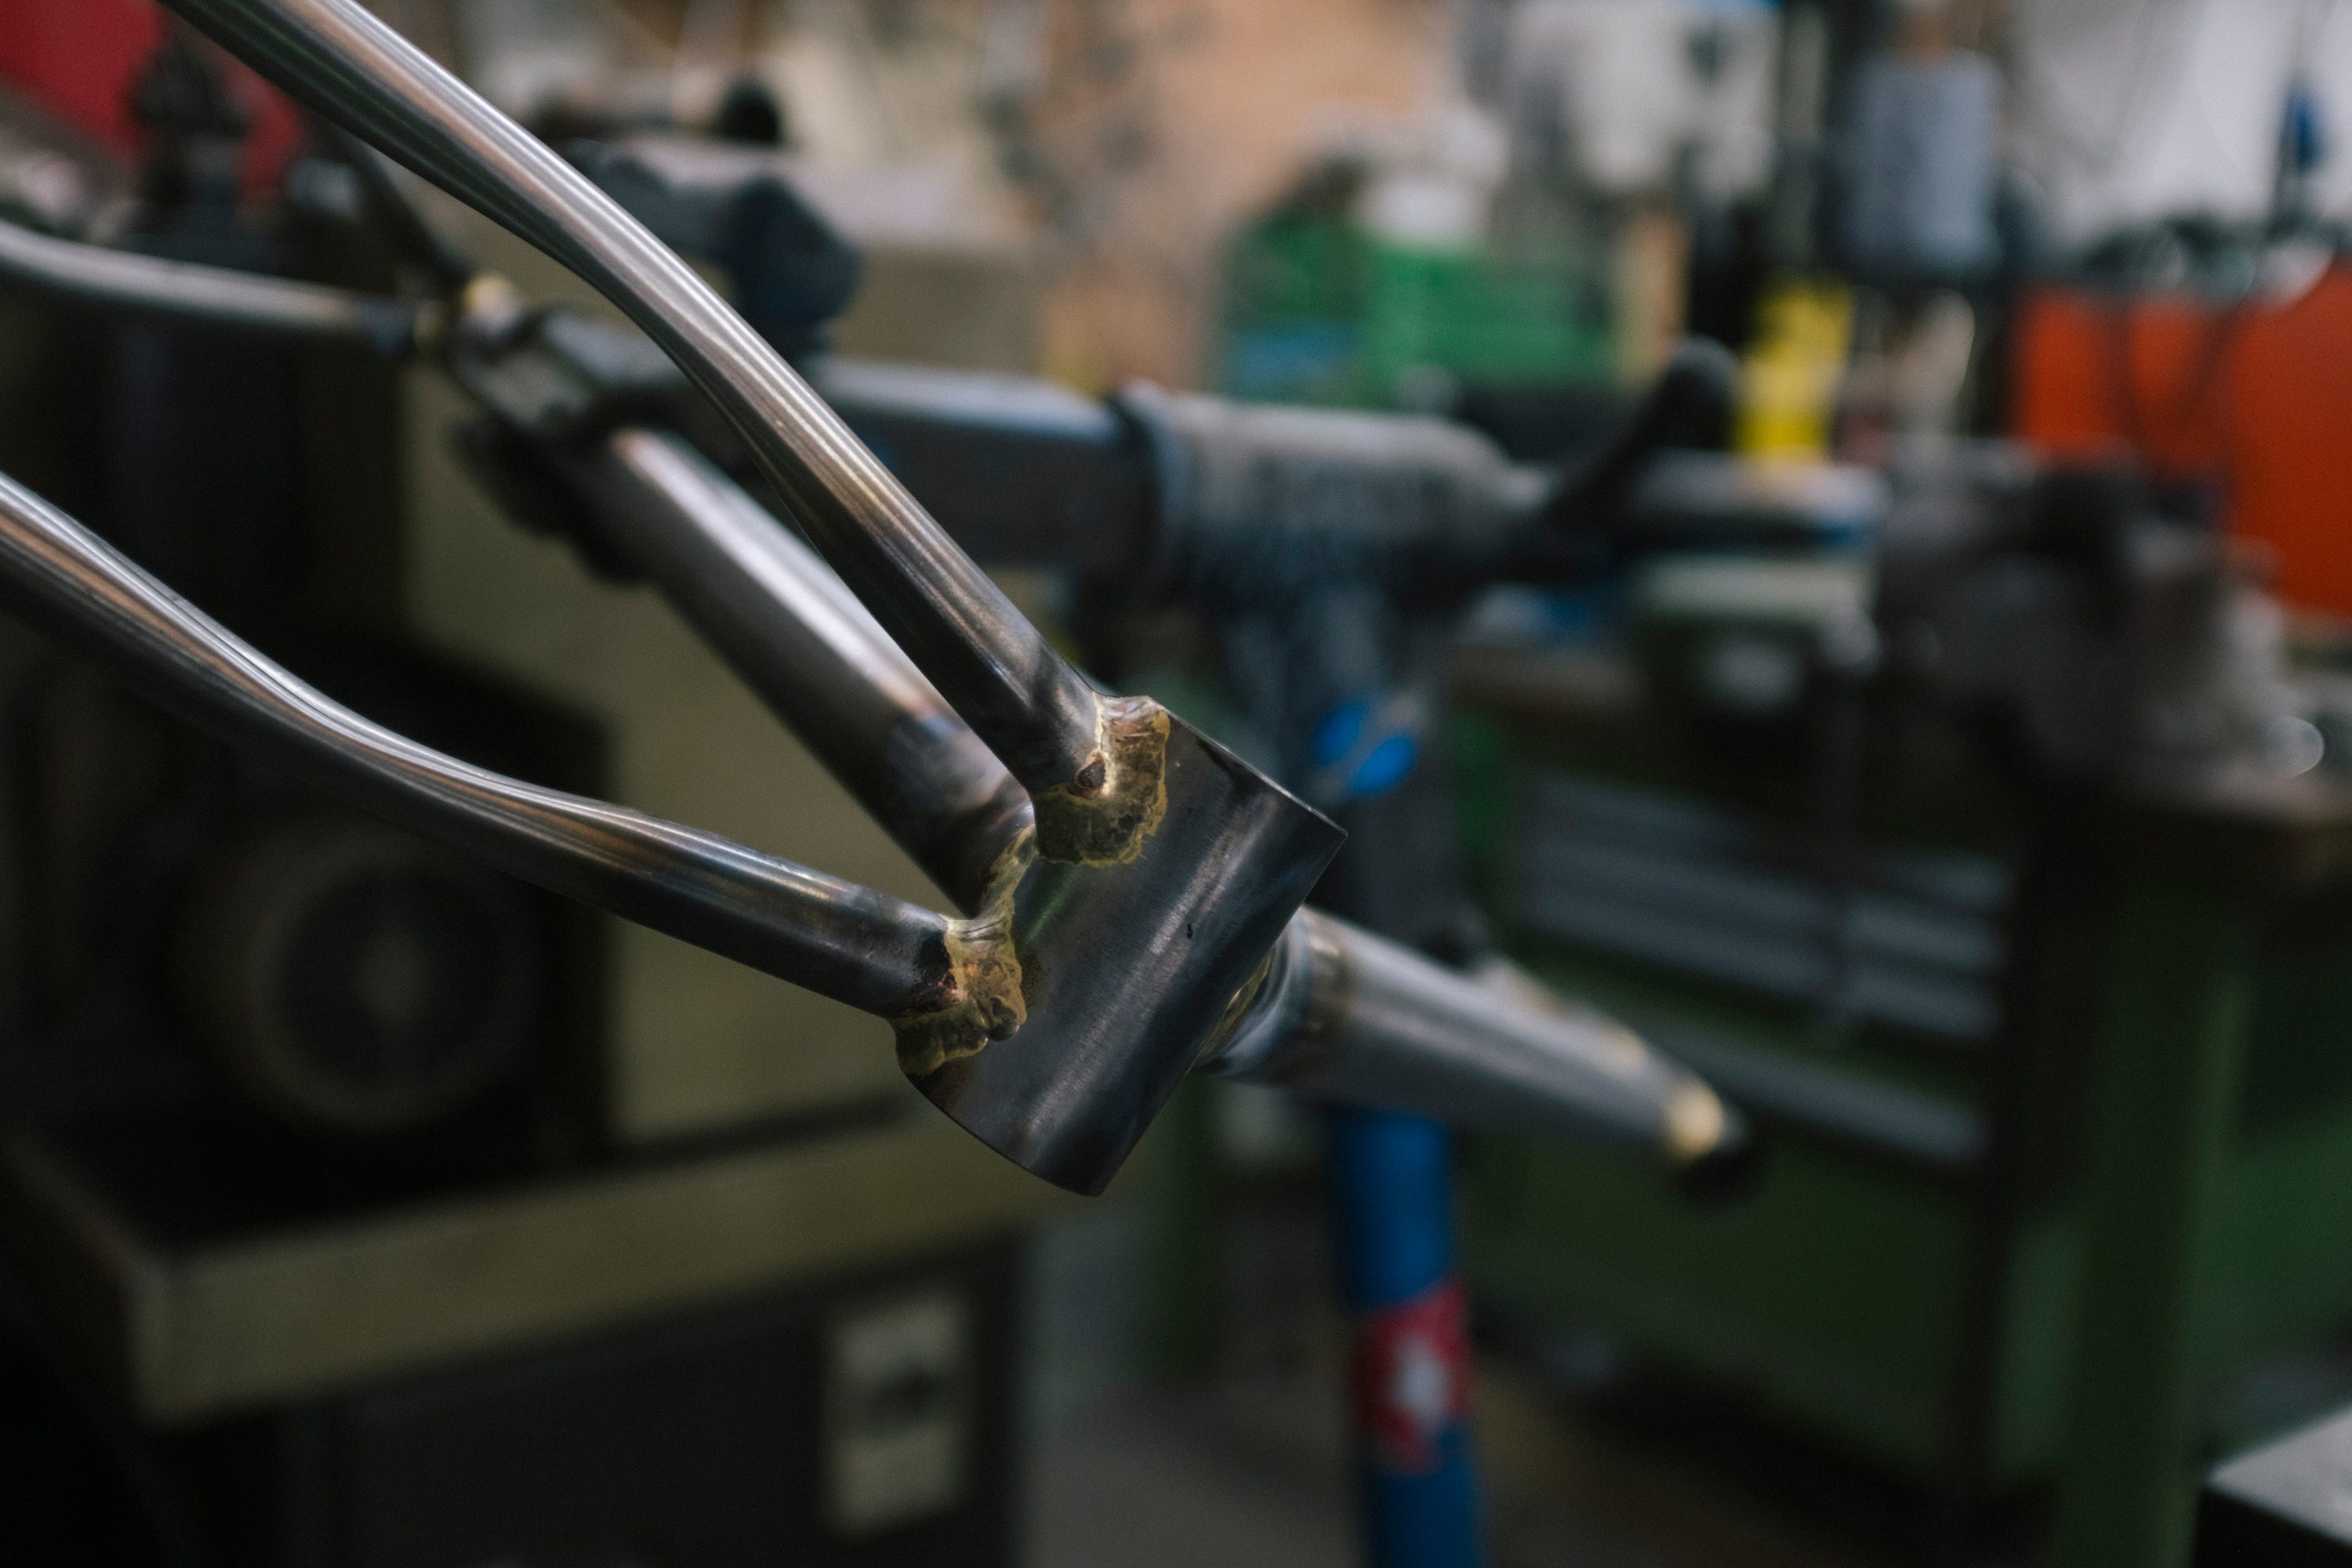
I woke early on day five, buzzing with the knowledge that I’d, in theory, be coming away with a completed frame. I took the van instead of the bike, missing the canal ride and the buzz of London’s streets, trading it for crawling in the morning traffic. After some final prep of cleaning off pen marks and squeezing in a bit more brazing practice, it was time for the main event, joining it all together. I fell into a calm, almost meditative focus while brazing, moving the torch back and forth, letting the brass melt and cool, overlapping each section so it flowed into the last, trying my best not to overheat it. I couldn’t tell you how long it took; time seemed to dissolve, much like the brass itself. A true flow state.
By the end of the day, Danny and I were holding objects that genuinely resembled bicycle frames, that once built up, would be ready to ride.
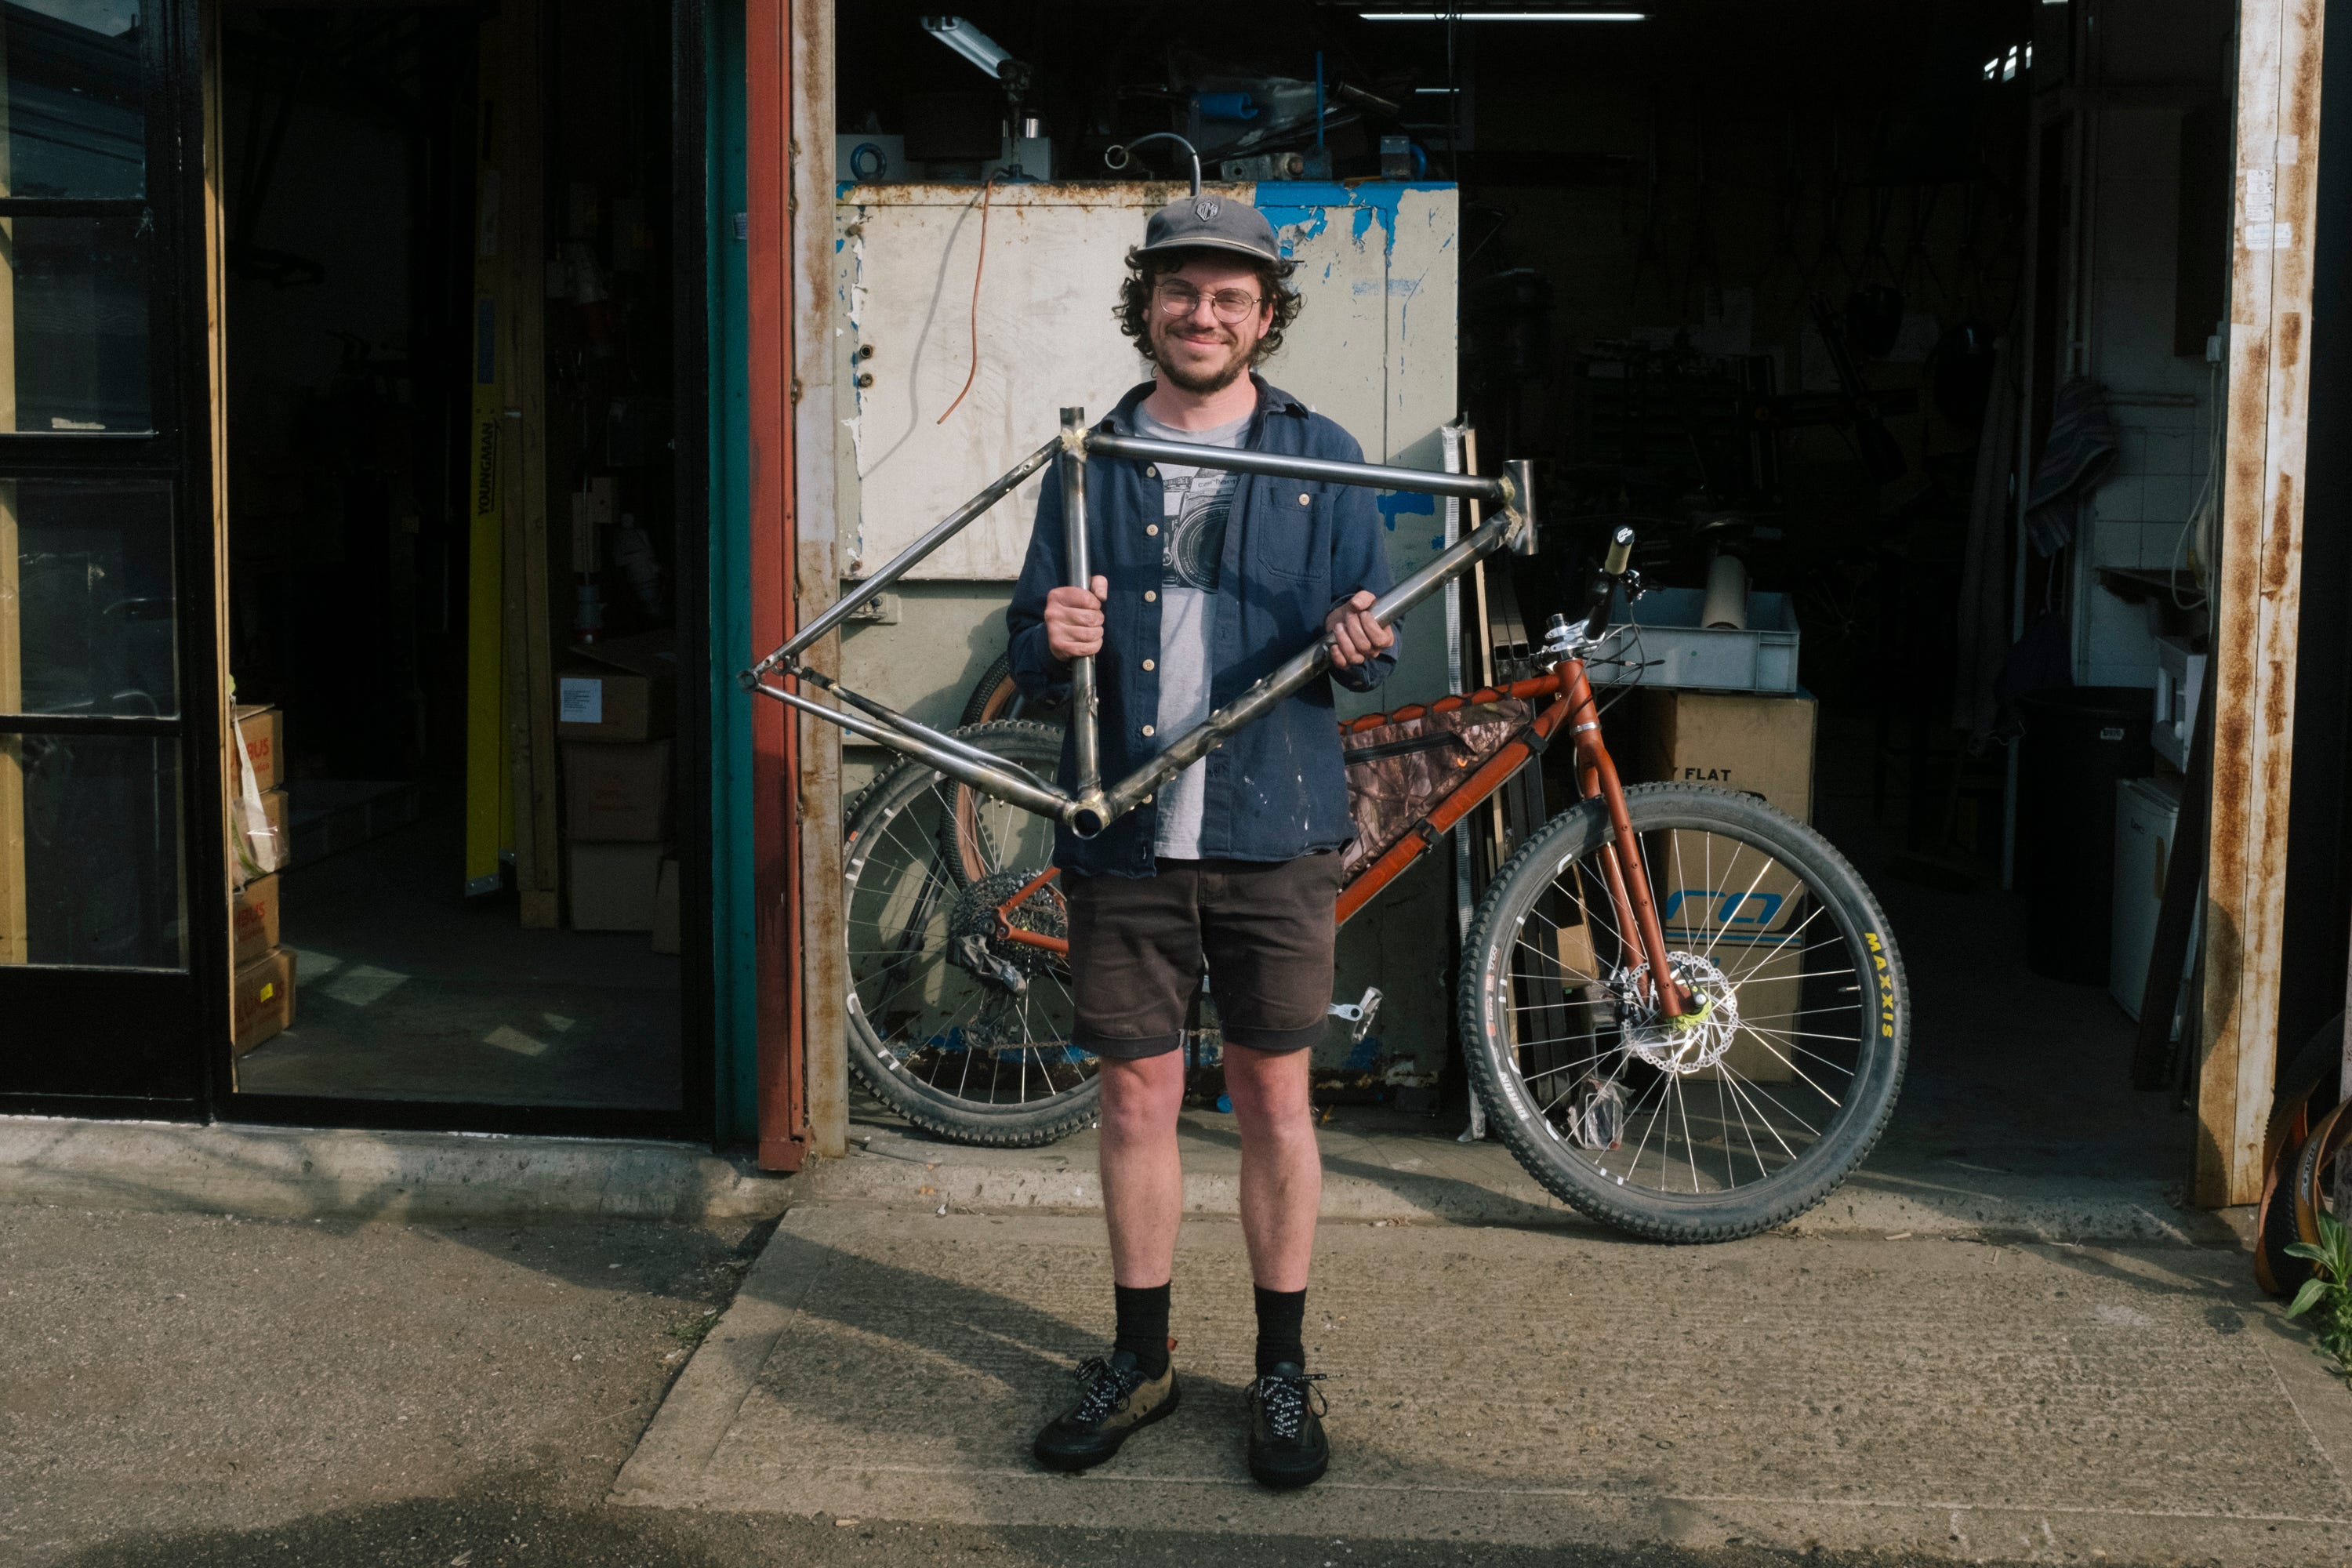
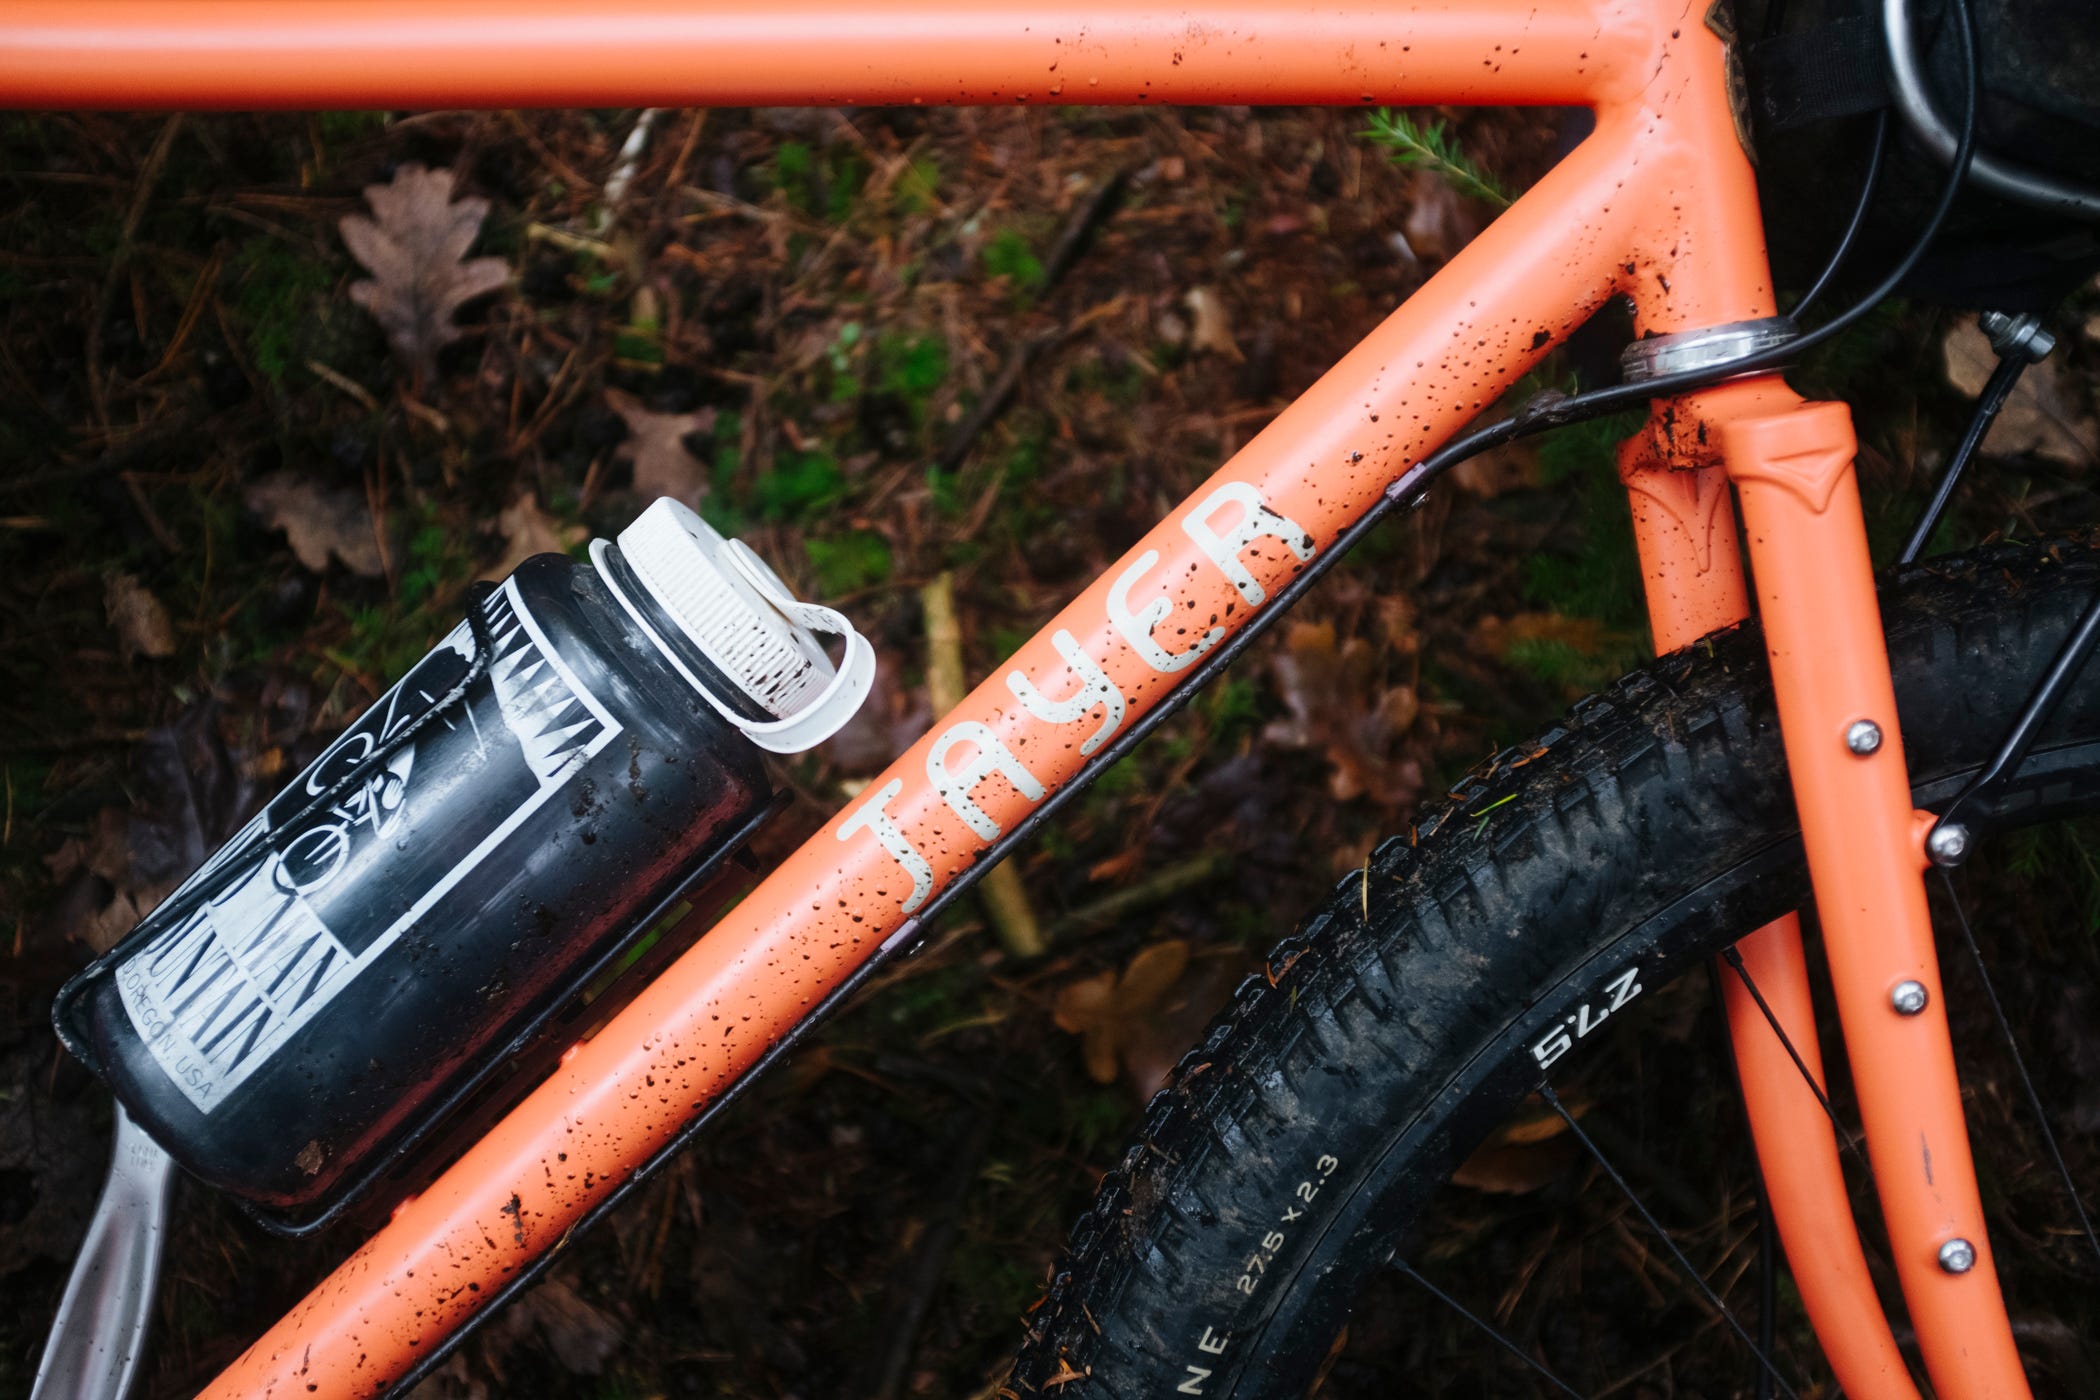
A few months passed as I agonised over powder‑coat colours, a decision that proved harder than building the frame itself. Eventually, I settled on an orangey salmon tone. When the frame and fork came back, I built it up using parts salvaged from the Meteh, along with a few carefully chosen treats I’d had my eye on for a while.
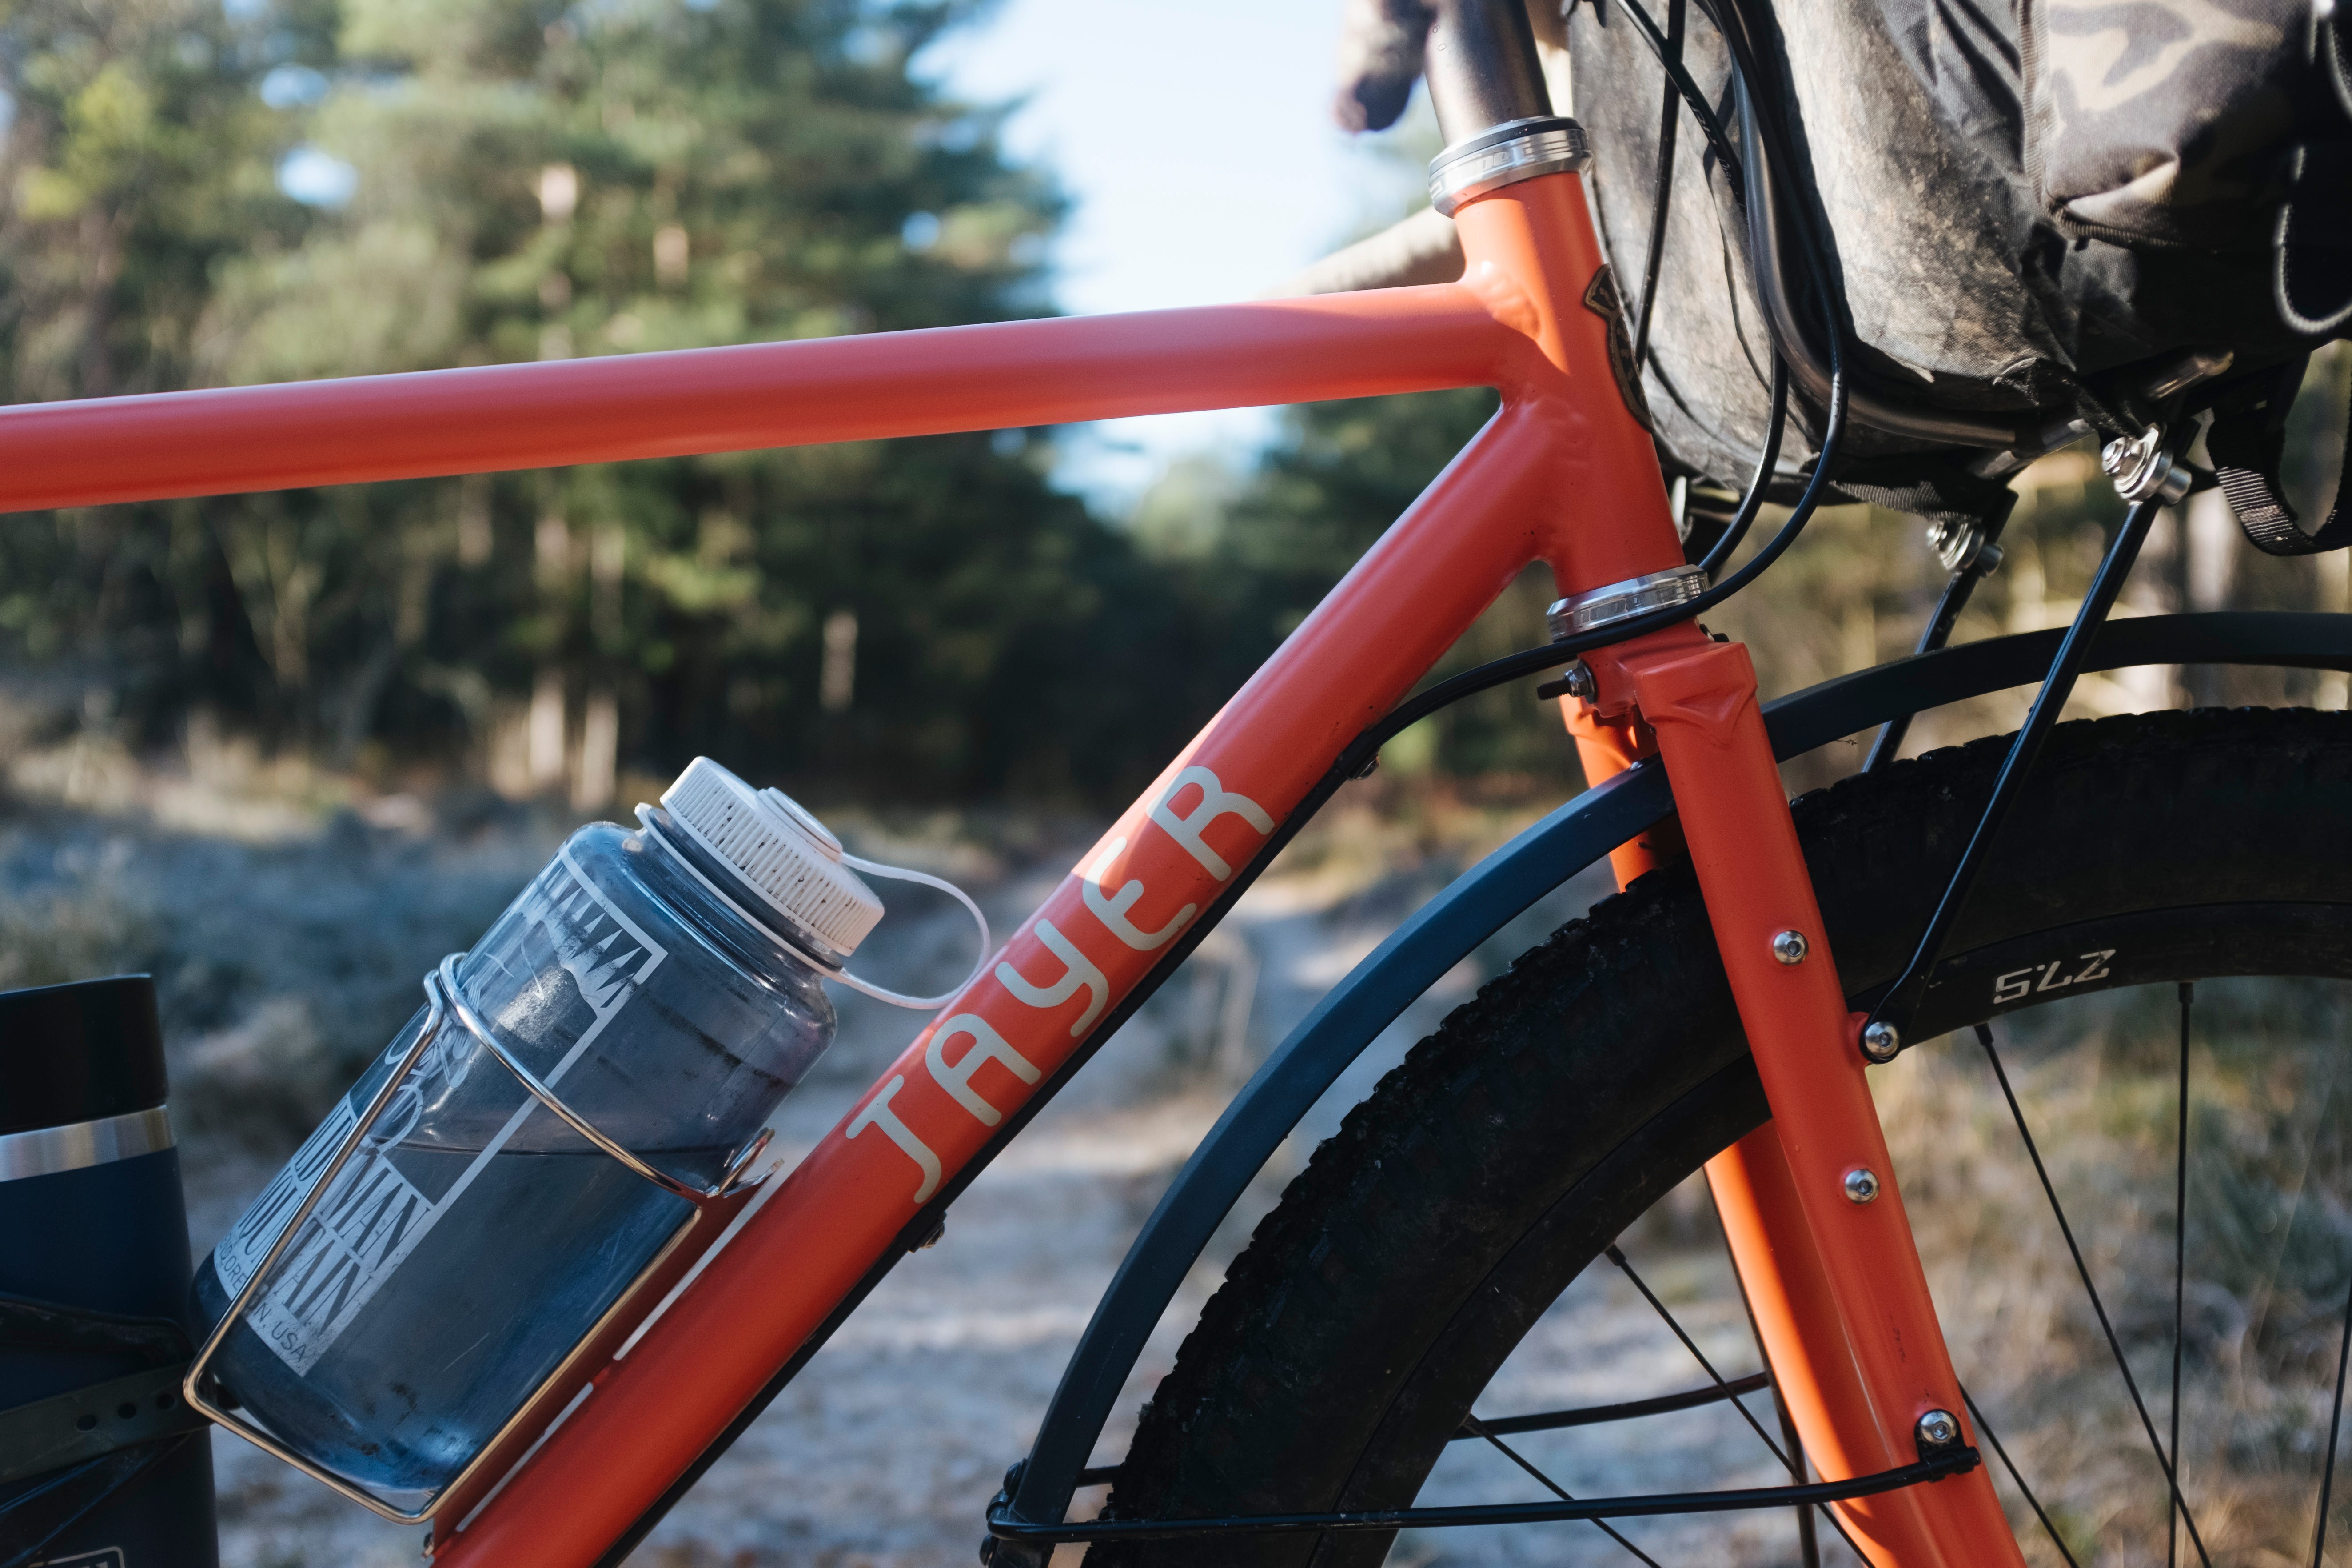
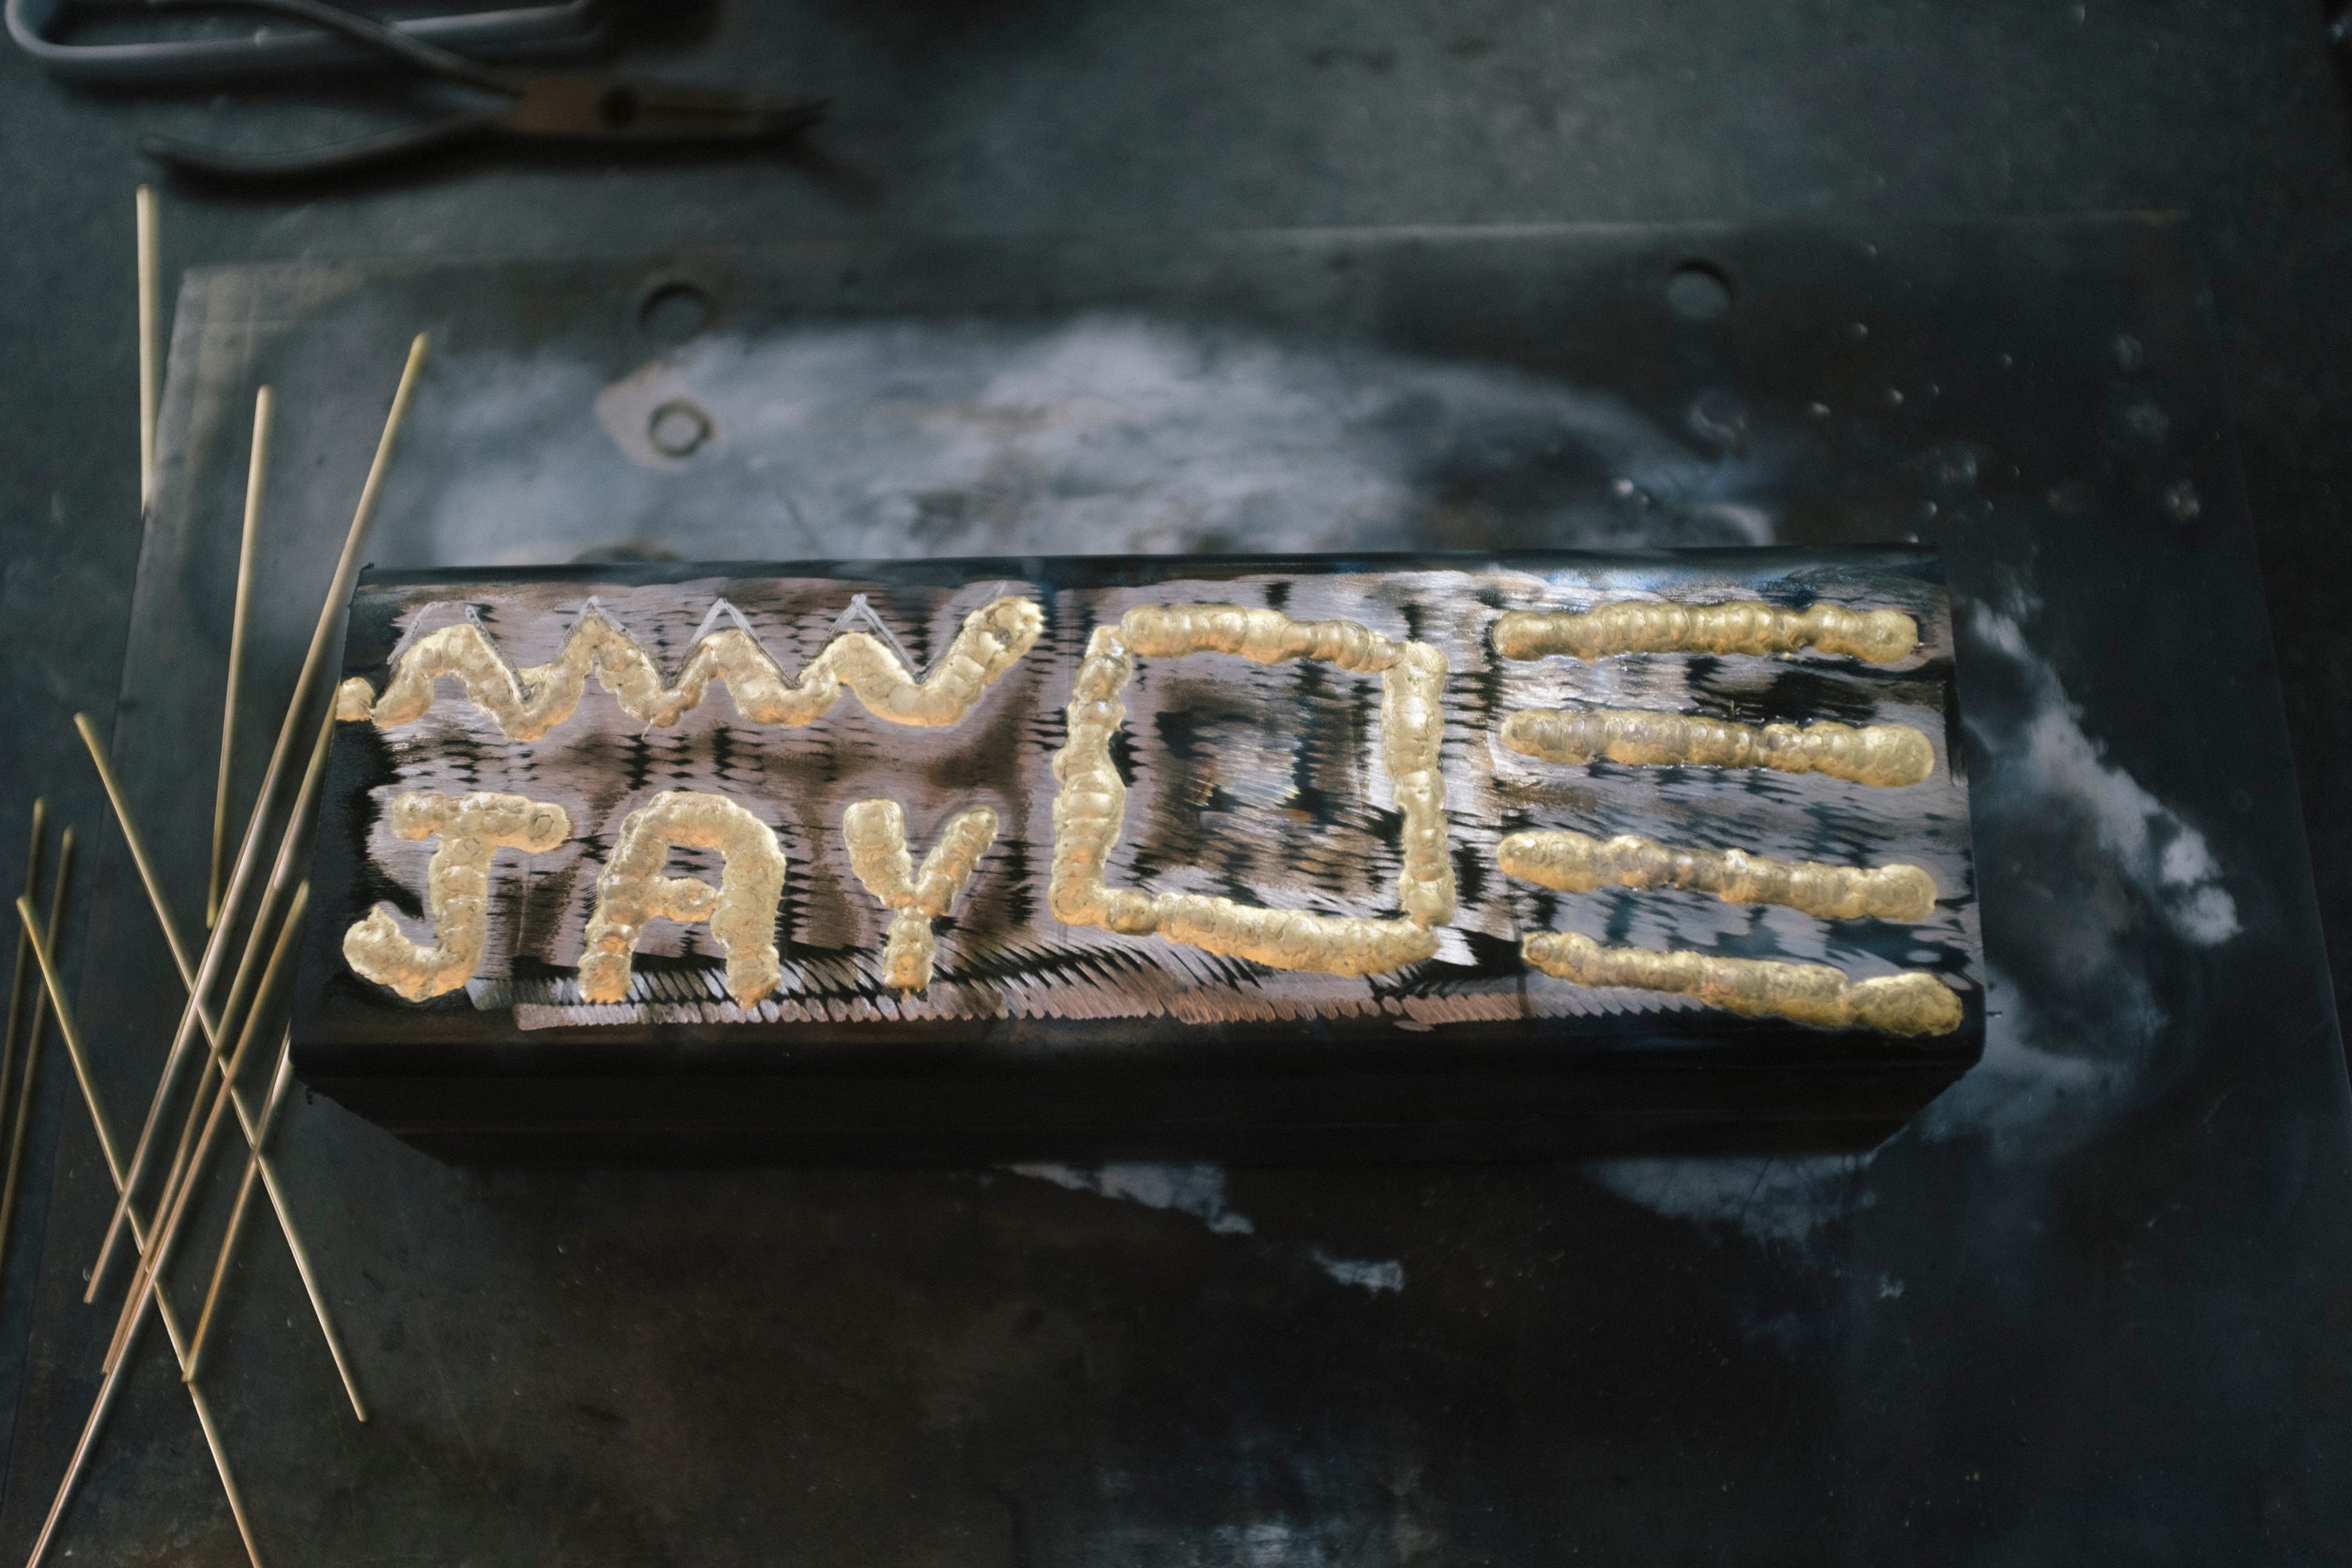
Chatting with friends about decals and head tube badges got me thinking it needed something of its own. ‘Jayer’ was suggested and instantly stuck. It made me laugh, and I liked that I could play with Stayer’s branding without taking it too seriously. The Jayer was born.
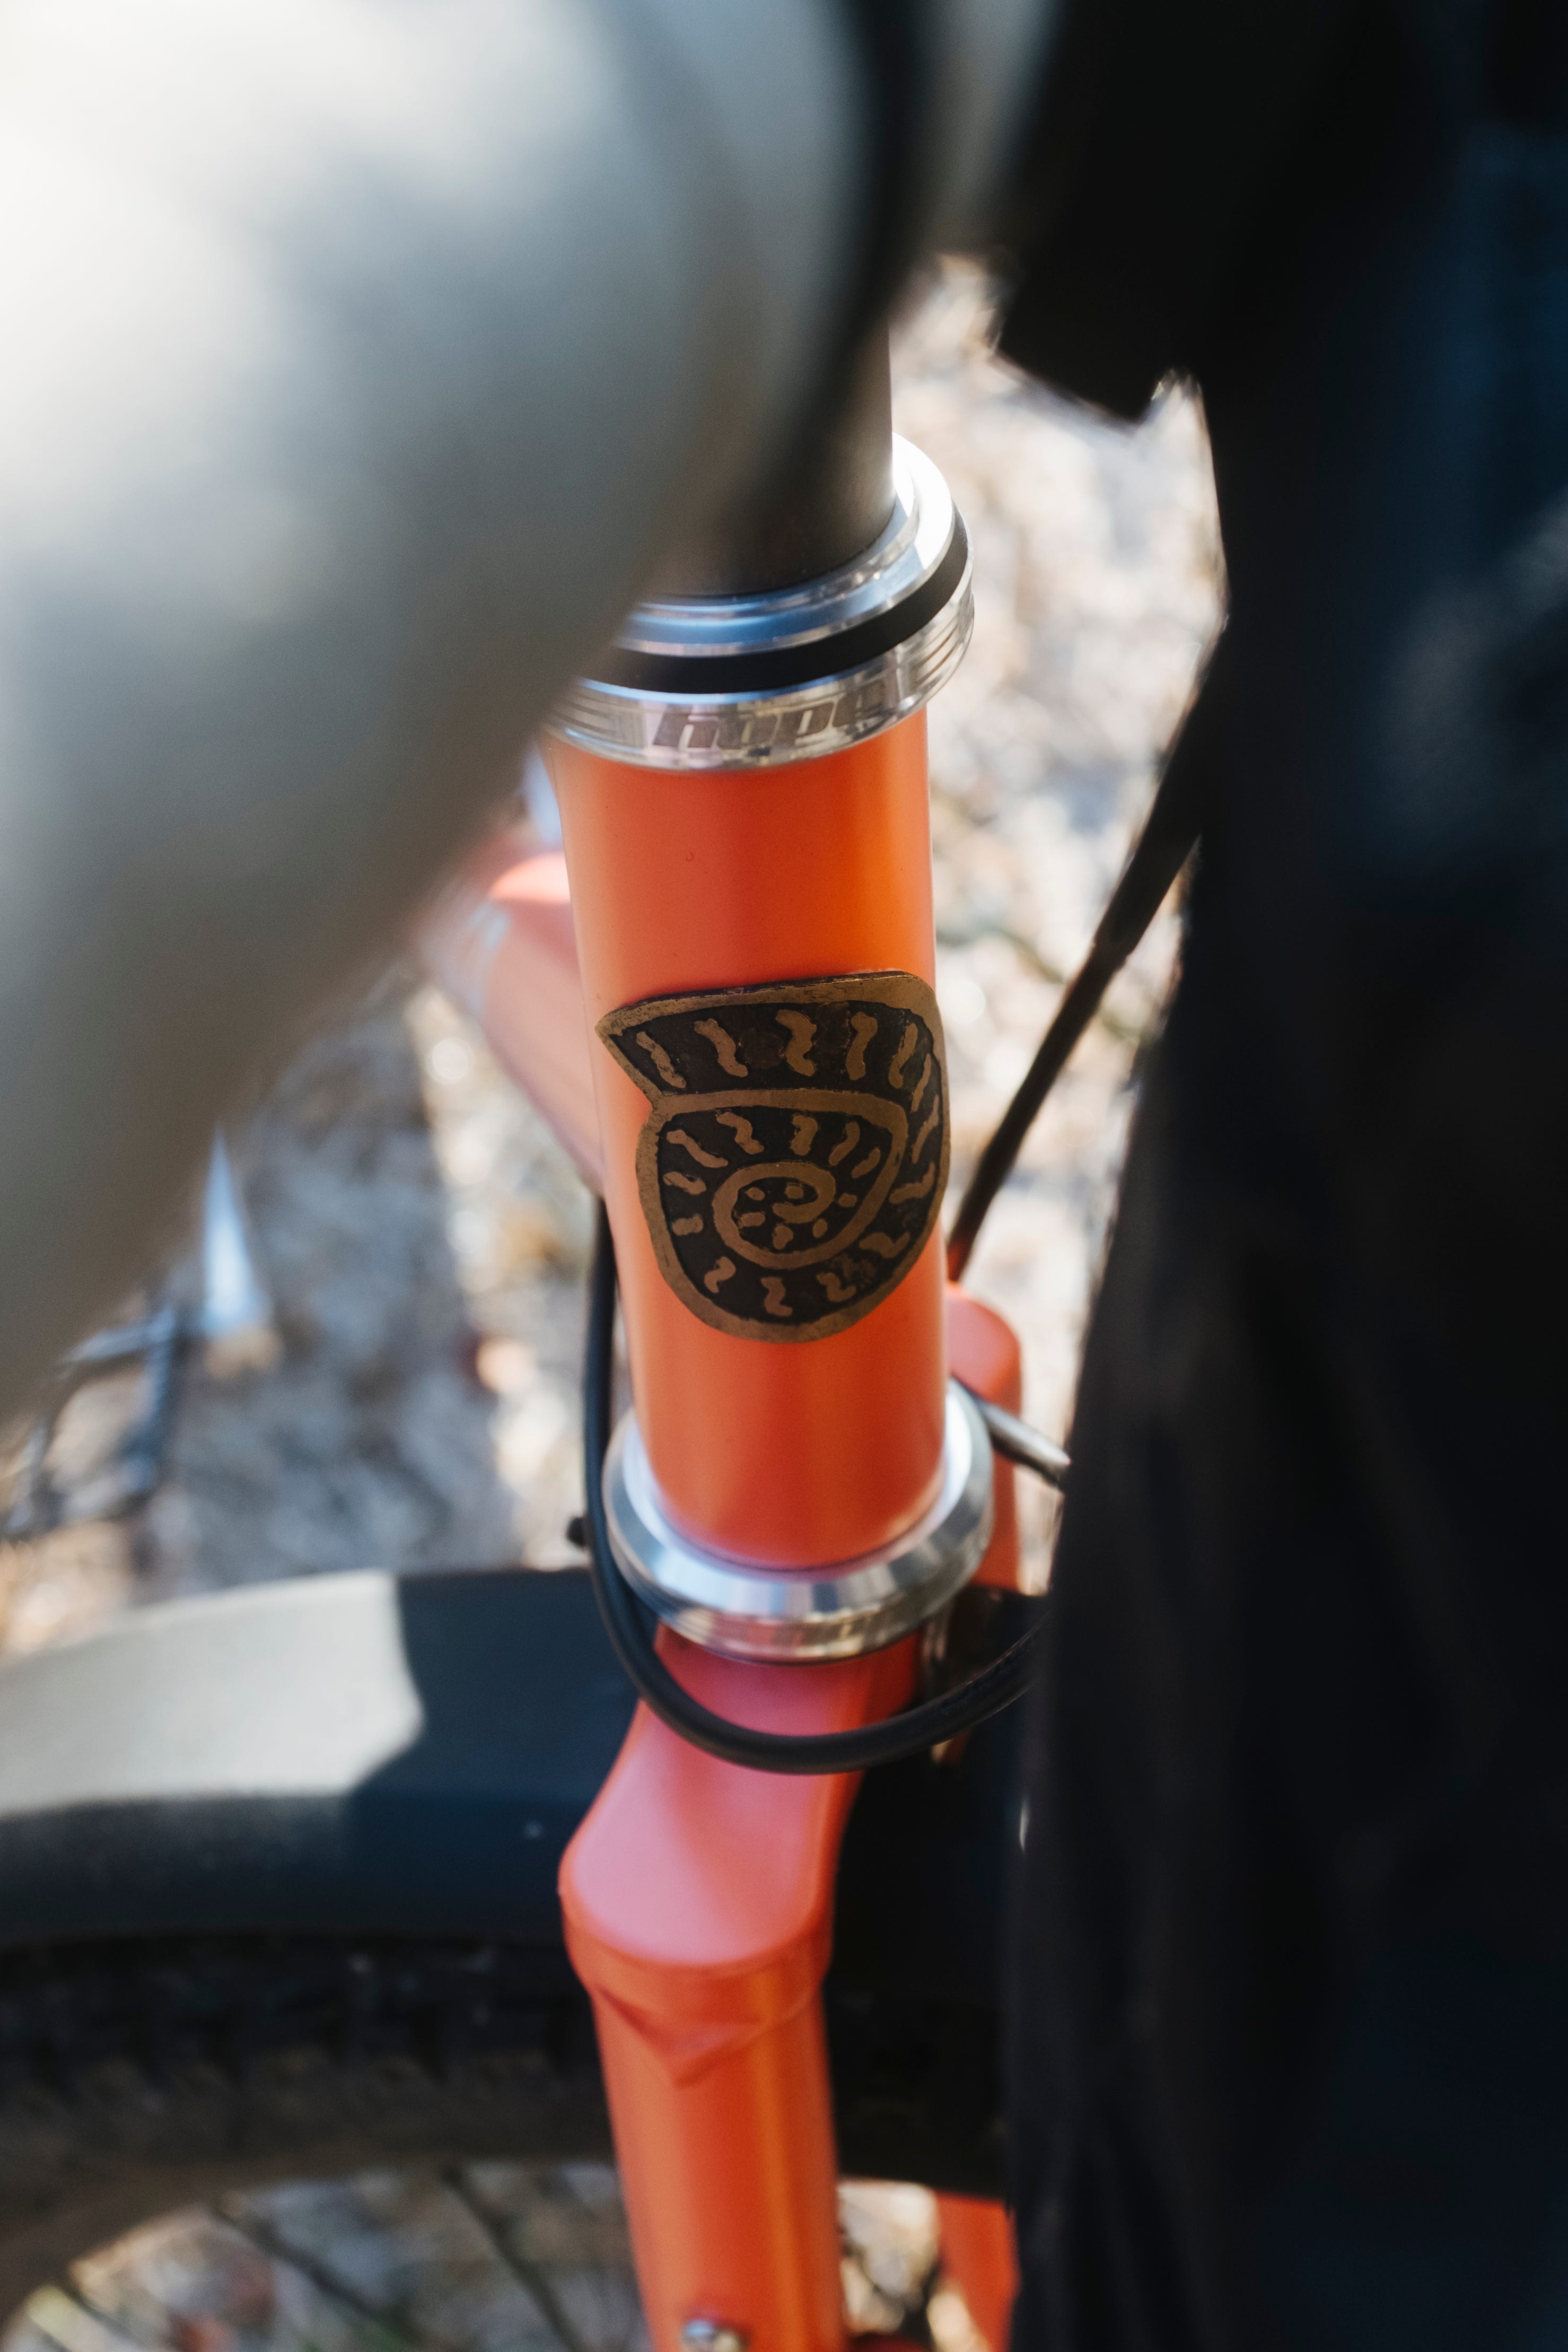
In the spirit of this whole venture I decided to undertake one more small skill. A quick Google search and a few videos later, I realised I could etch my own brass headtube badge. A modest extension of the same hands-on process that had shaped the frame itself, with a nod to the brass that held it all together. I also black-oxided the stem, partly for protection, partly to let the brass show through again. Both felt like the final parts of putting the whole project together.
After sketching out a few ideas on paper, I settled on a simple ammonite design for the badge: a nod to the Jurassic Coast where I live and to the slower way of moving through the landscape that the bicycle allows.
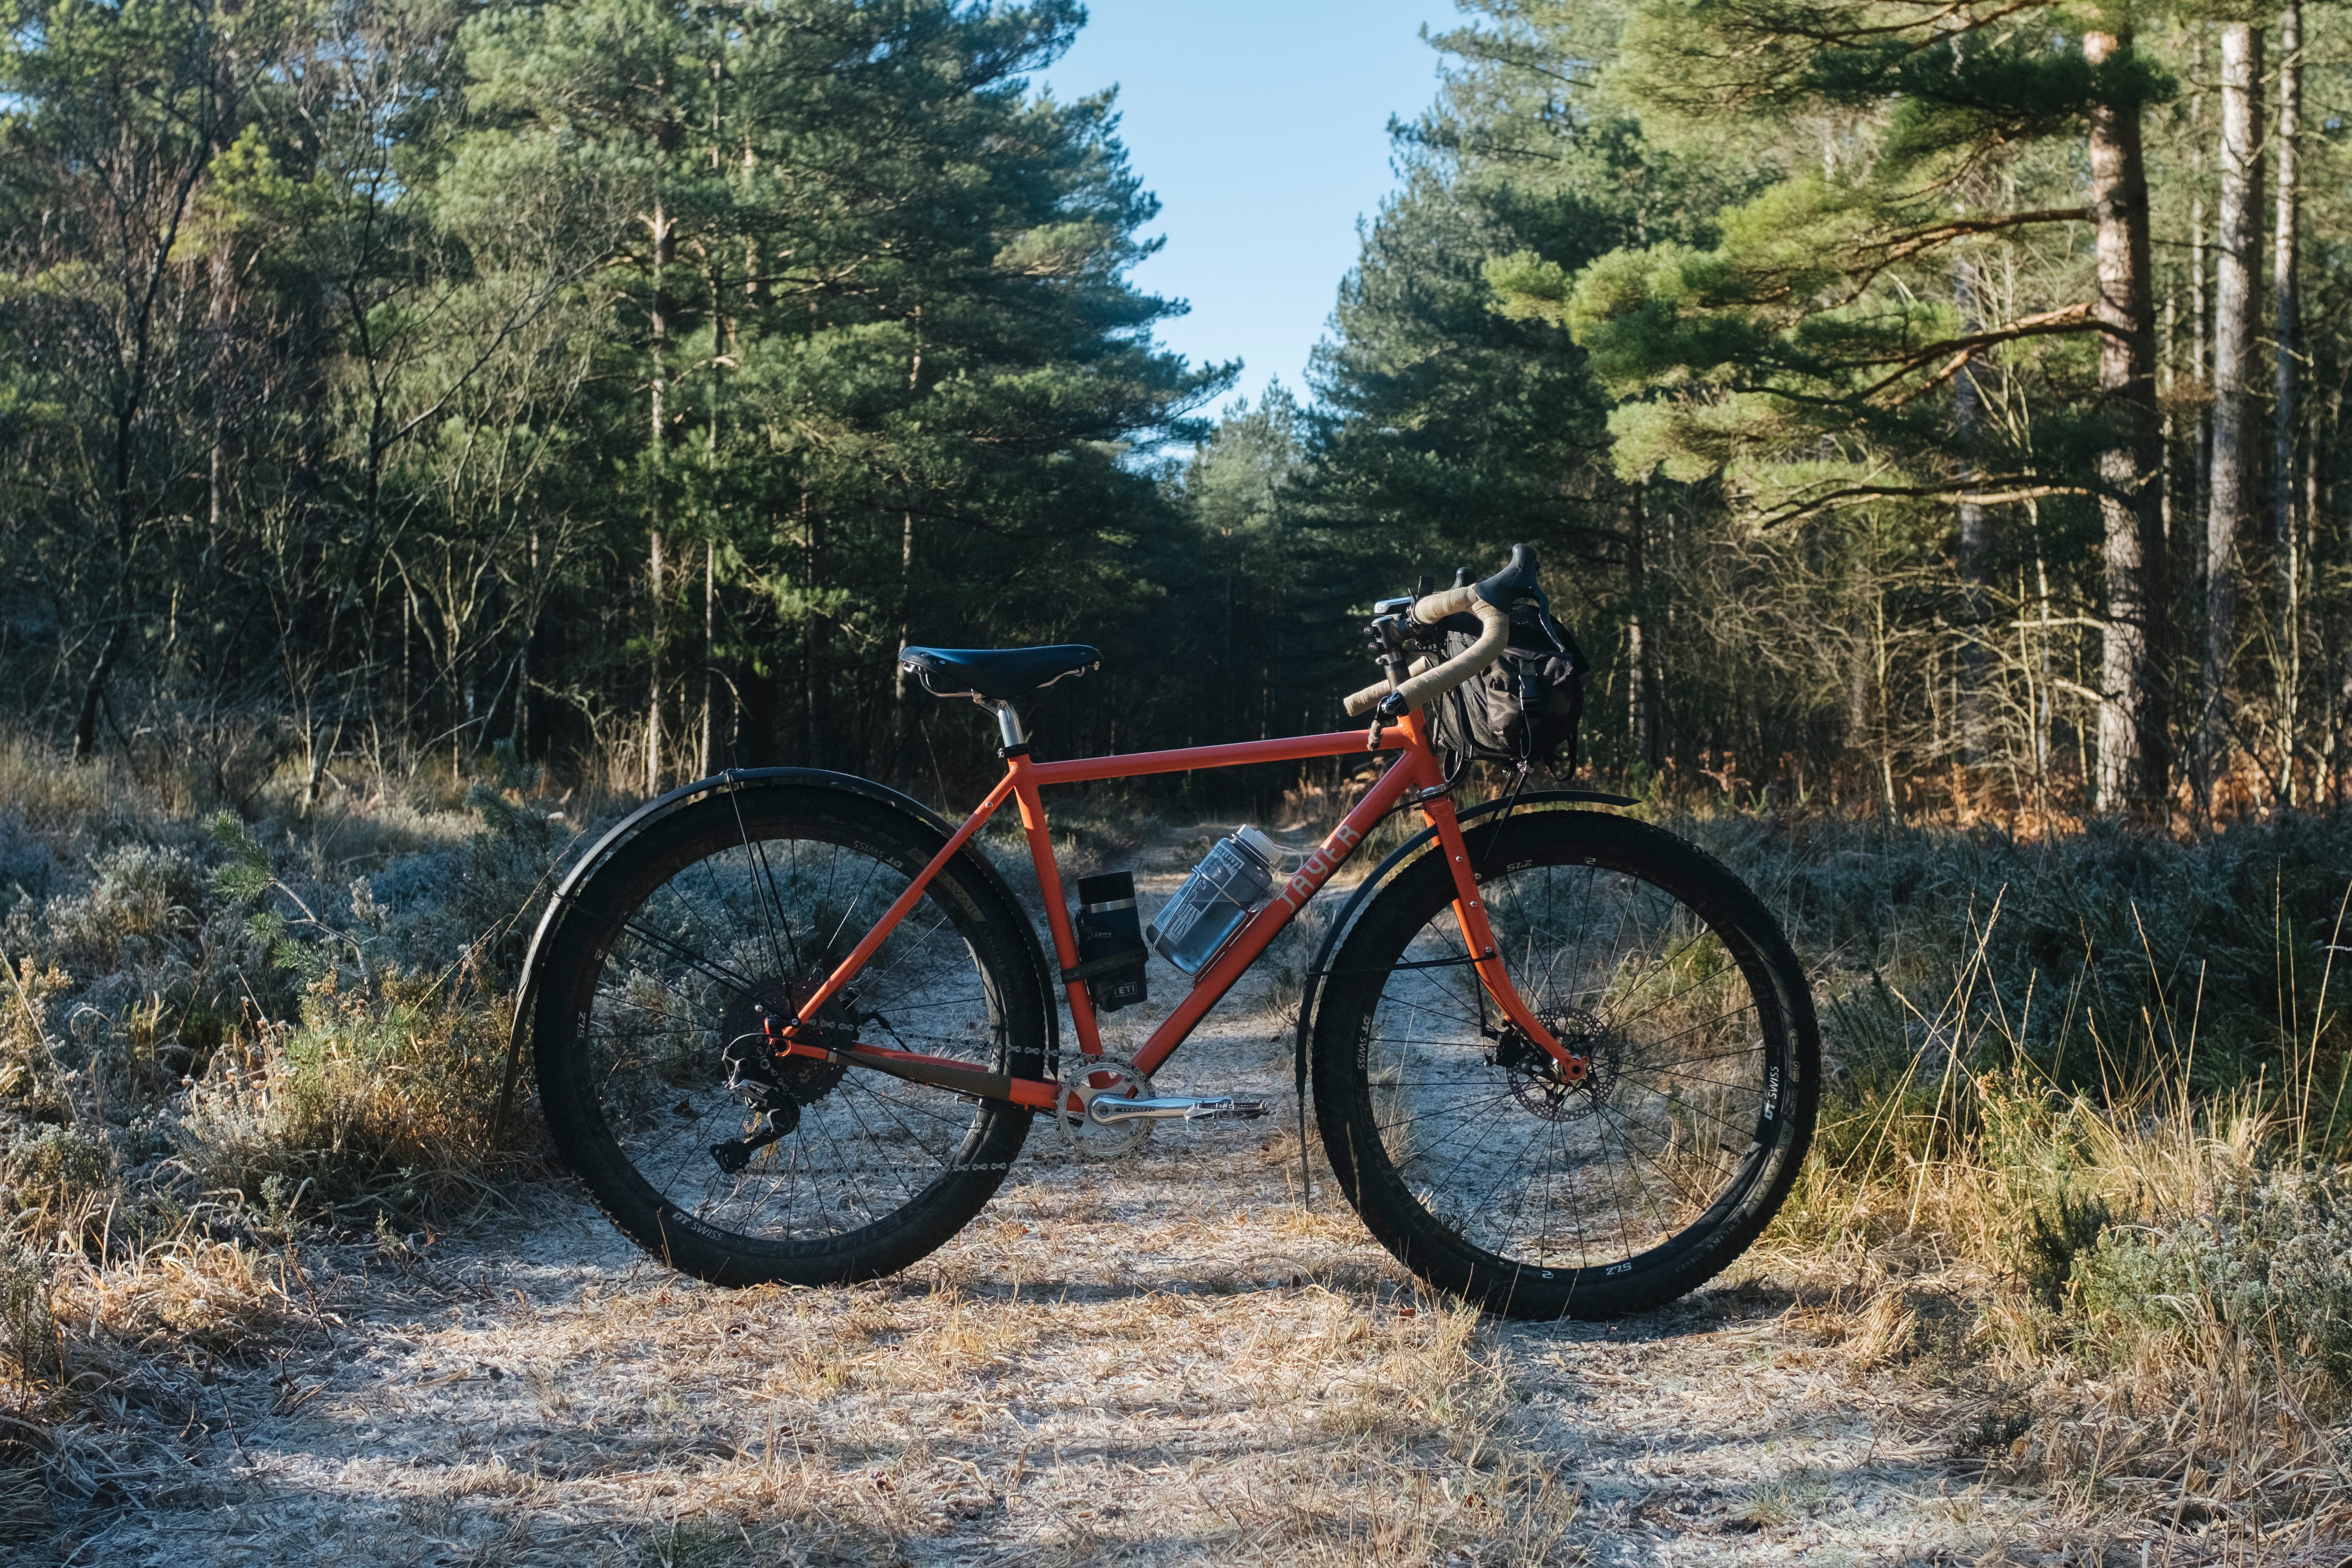
Learning to build a frame left me with a deep respect for the process, the material and the people who commit to doing this as a full time endeavour. The frame carries so many small imperfections and every time I ride it, I’m reminded that taking on something unfamiliar and challenging was as meaningful as the final result and the mistakes are what makes in unique.